VST Plugins are an essential element of a producer’s toolkit.
A VST Plugin (Virtual Studio Technology) is a virtual music software tool that expands a DAW’s features by adding new effects or instruments to the system. There are both paid and free vsts.
FL Studio is a fantastic DAW used by many music producers. It has both free and paid versions, so is ideal for beginners looking to learn music production.
We’ve put together this quick guide to help you add vst plugins to FL Studio.
This guide works for both Mac and Windows computer users!
How to add Plugins to FL Studio [Step-by-Step]
VST Plugins are an essential element of a producer’s toolkit. To add VST Plugins in FL Studio, you need to follow the steps mentioned below:
- Download & Install the VST Plugin
- Scan for Plugins
- Finding Plugins in FL
- Adding Favourites, Deleting Old Plugins
- Adding VST Plugins on a Track in FL Studio
Stet-by-Steps Instruction on Installing plugins to fl studio 12
#1 Download & Install the VST Plugin

Download and install the plugin from the manufacturer’s website.
Most VST plug-ins have their own installer. I like to save all the installers to a folder for easy access later. You never know when one will break and need re-installing.
Make sure you install the newly downloaded .dll file to a known folder path location on your hard drive. When installing, we recommend storing them in a custom FL Studio plugins vst folder.

Generally, the best idea is to install it to the default directory as prompted by the installer. Once installed, we need to move over to fl studio to set up the new vst.
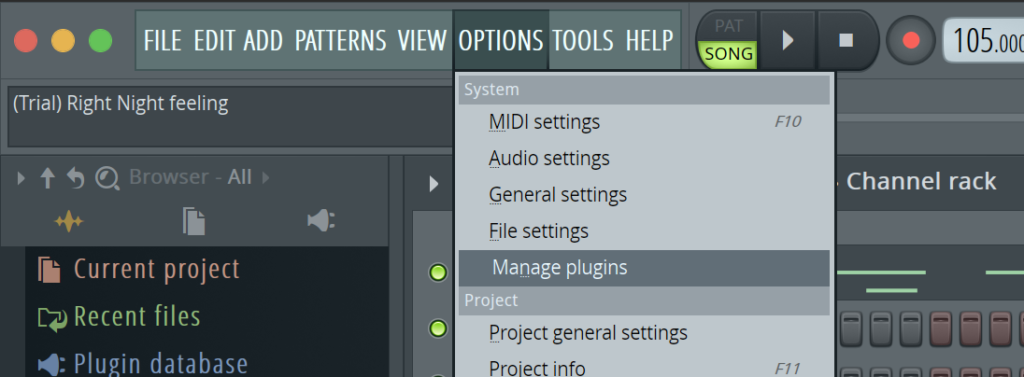
Open FL Studio, and open the Plugin Manager window from “Options > System > Manage Plugins” in the top menu.
#2 Scan for Plugins
Once the virtual instruments are installed, FL studio needs to perform a scan to find and load in the vsts.
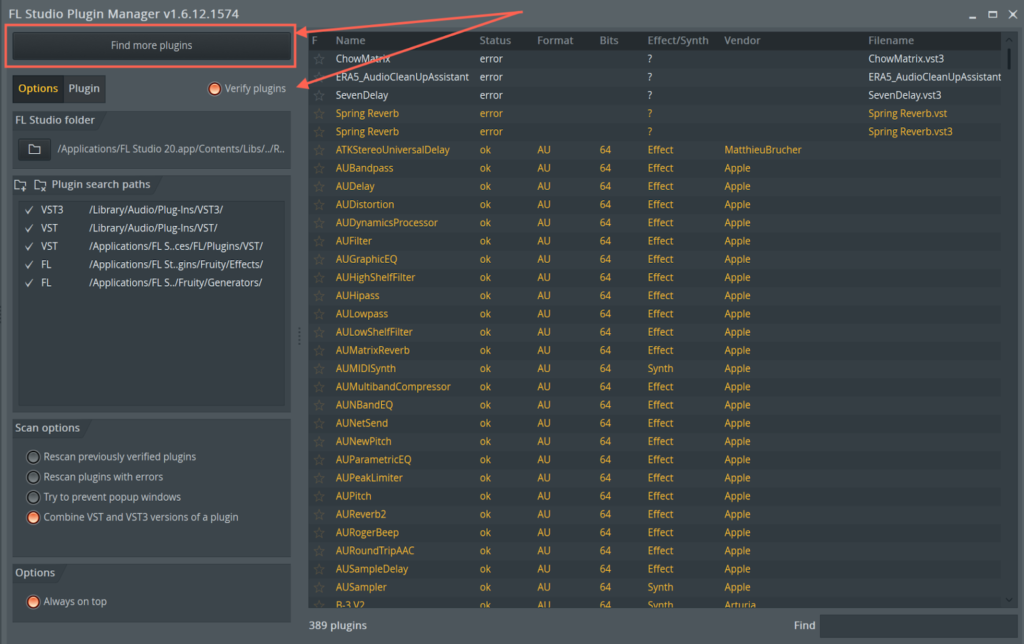
After opening the Plugin Manager, the best option is to click the “Find more plugins” button. This automatically scans the computer for VST files. If you are using windows or a mac, this will free up a lot of time and stop you from having to search for each plugin yourself.
Checking the “Verify plugins” option is recommended as this sorts the plug-ins correctly into the various categories of effects or generators.
When you click “Find more plugins” it may take a few minutes for the program to reveal everything.
Note: Only running a “fast scan” may not sort the plug-ins into categories.
If plugins are stored in a different location on the computer, each location path should be added to the “Plugin Search Paths” field on the left.
Click on the “Add Folder” icon, then navigate to the folder path, and select it. The folder will now be searched when you click the scan button.
Also, add folder paths if the scan doesn’t automatically detect them during the search.
Checking the “Combine VST and VST3 versions of a plugin” is a wise idea and will prevent confusion arising from duplicate dll and vst files.
#3 Finding Plugins in FL
After the scan is complete, your new plugins are available to use in FL Studio.
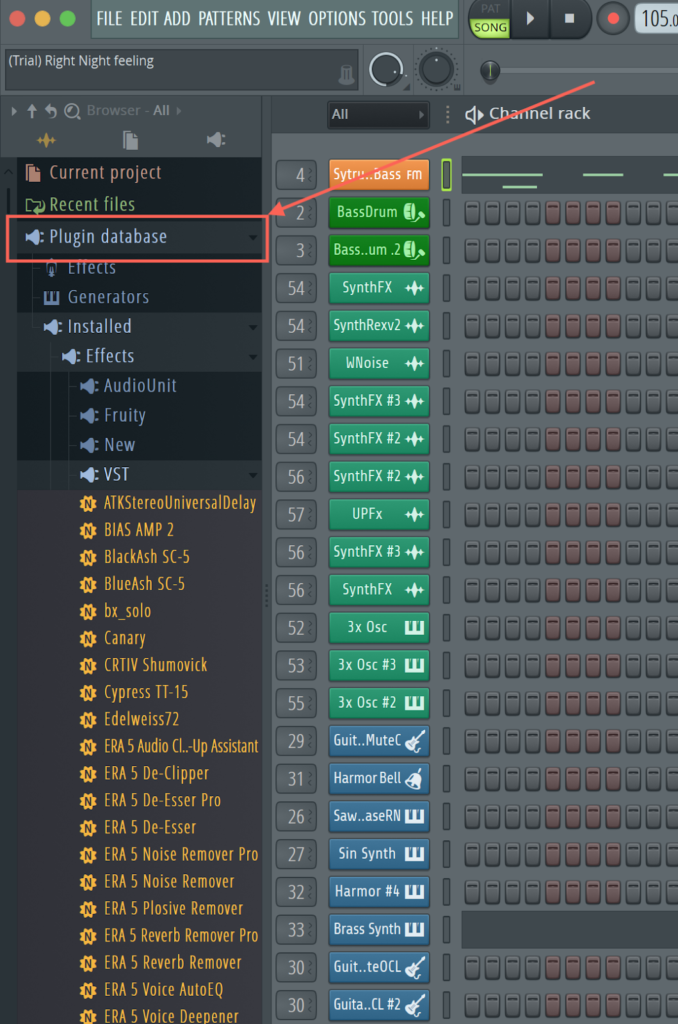
Scanned plugins appear in the browser, under:
“Plugin Database > Installed > Effects > New/Generators > New”.
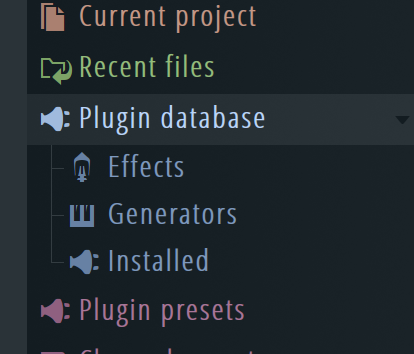
The plugin database windows should display all the new custom vst software installed.
If the search does not detect all instruments, the install folder may need to be re-referenced in the plugin manager window.
#4 Adding Favourites, Deleting Old Plugins
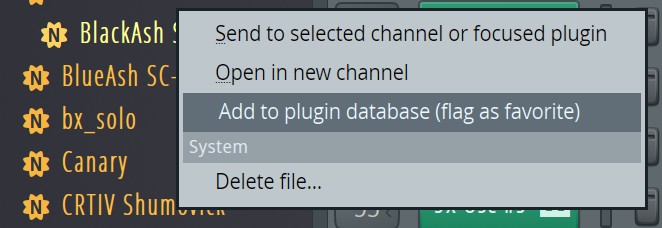
FL Studio makes it easy to save plugins to favorites for easy access later. Once the plugin is selected in the window, choose the “Add to plugin database (flag as favorite)” dialogue.
To remove a plugin, select it in the browser, Right-Click it, and select “Delete File…”.
This doesn’t delete the file but removes the entry from the database. This can free up space and declutter the menu.
Related: Read our guide on Fl Studio.
Adding VST Plugins on a Track in FL Studio
Once the vst plugins are installed and scanned, they can be added to tracks in FL Studio.
Simply open the Plugin Manager, select the desired vst plugin, then drag and drop it onto the track. This will create a new instance of the plugin on the channel.
You can search the database for a specific plug-in to prevent wasting time menu diving.
Alternatively, a better option is to use the “Plugin Database” and “Plugin Presets” folders.
Once these folders have been opened, they will display all the stored vsts. Again, simply drag and drop plugins from here onto the desired channel.
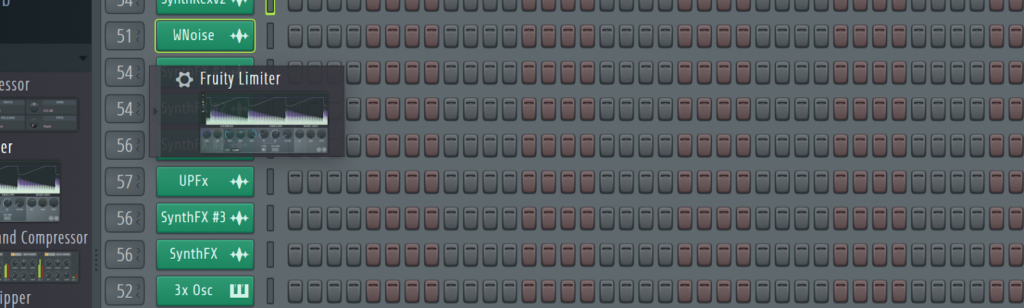
You can also add a plugin directly to the mixer, this is great for mixing plugins, e.g compressors, EQs, reverbs, and delays.
The Plugin Database will display all downloaded and scanned plug-ins.
Plugin Presets is a folder to fill with your own inspirational presets and patches.
It’s a good idea to use this to organize your favorite plugins into related categories. Any folders created should be separate for generator or effect versions.
This newly created instance can be duplicated, modified, or deleted. Sometimes the plug-in windows can clutter the screen.
Note: These can be expanded and minimized from the mixer.
Many VST Plugins can also be automated within FL Studio which is great for creative sound design.
That’s it!
Looking for the next best vst plugin to use with FL studio? Check out some of our related posts exploring the best vst plug-ins on the market.
Also read our other Fl studio post on how to add automation in fl studio and detailed review on FL Studio.
Noah is an accomplished audio engineer with several years of experience producing music for major companies and independent artists. He enjoys sharing his vast knowledge of audio engineering topics to help musicians and music producers create great music.