Mastering is an essential step to make your music sound professional and ready to be shown to the world. This is the stage that comes after mixing and it is meant to enhance your song dynamically, make it brighter and set it up to the loudness standards of the industry.
During the mastering process, the producer or engineer may use different plugins and effects such as EQ, compression, and limiter to achieve a loud and shiny final result. However, there are different approaches to do your master depending on your track’s genre, overall feel, and style.
If you want to learn how to master in Logic Pro X, keep reading, as we will break down every step needed for taking your music to the next level using only the Logic stock plugins; But as well recommend you some free tools that you can download in to assist you even further in the process.
How to master in logic pro X
Logic Pro X is one of the best digital audio workstations (DAW) in the market today. Here are a few ways by which you can master in Logic Pro X:
- Before We Begin – Start With a Good Mix
- Bouncing Your Mixdown for Mastering
- Reference Track
- Compressing
- Eqing
- Saturation (Optional)
- Stereo-Widening (Optional)
- Limiting
- Exporting Your Master
- Bonus Tip: Test Your Master With Different Listening Systems
What is Logic Pro X?
Logic Pro X is one of the best digital audio workstations (DAW) in the market today. The software is a complete music production/mixing/editing suite that features all the plugins and tools one may need to create and improve his/her music.
If you would like to learn more about Logic Pro X, please check out our Logic Pro X Review 2021 article, an up-to-date guide breaking down all the functionalities and aspects of the DAW that will help you decide if it is a good investment.
How to Master in Logic Pro X – Step By Step
Before We Begin – Start With a Good Mix
Mixing and mastering go hand in hand. You can’t have a great sounding master without a proper mixdown so if you’re a beginner, we advise you to study the subject extensively. There are tons of great videos and tutorials on the internet, as well as courses, but it may be difficult to know where to start. Here are a few important points to learn about to help you master the subject:
- Gain-Staging
- Proper Level Settings
- Eqing
- Compressing
- Distortion
- Time-Based Effects (Reverb and Delay)
- Modulation (Chorus, Phaser, etc)
We strongly recommend that you take a look at our Basic Mixing Techniques video as well. It is done in Pro Tools, but the concepts are universal and will also apply to Apple’s DAW. With that being said, let’s take a look at our step-by-step guide for mastering in Logic Pro.
Tip: For tips on how to improve your workflow and get results faster, consider checking our Logic Pro X Shortcuts guide.
Bouncing Your Mixdown for Mastering
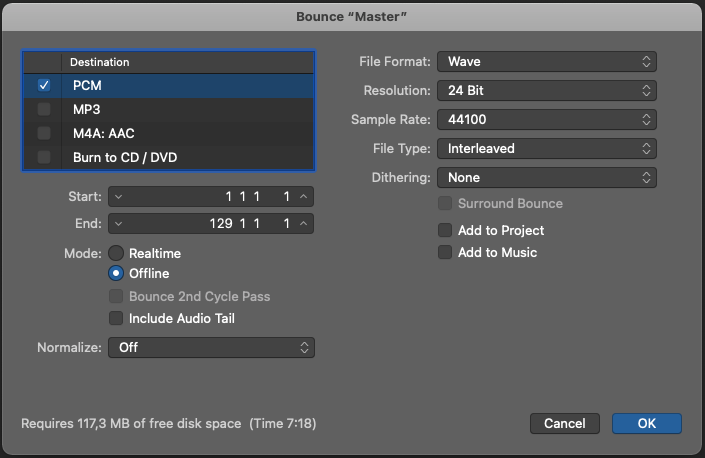
There are a few things you should note when you bounce your mixdown for the mastering process. The first is the amount of headroom that is present in your mix, that is, at what level it is peaking. You can easily notice this by looking at your master channel dB meter.
We advise you to have your track peaking at about -12dB to -8dB. That way you will have a safe interval to work with since you will be increasing the loudness of your song while mastering and you don’t want your audio to clip. If your mix is too above or below that range, you can simply insert the gain plugin on your master channel and trim it.
The next step is choosing the right audio format. Choose WAV or AIFF with a 24-bit resolution. Keep your sample rate the same as your project (in most cases 44100) and the file type/stereo mode on interleaved.
Reference Track
Now that you have your file bounced and ready, take a minute to search for one or two reference songs. You should pick something in the same style and genre as your music and, above all, that you like the sound of. Sure, you can use the same tracks you’ve used for referencing your mix.
This step is important and professional sound engineers do it all the time. You can also take a moment to compare your reference with your own track, using tools such as the Multimeter to see how it performs on the technical side and to analyze the frequencies of each of the files.
Compressing
Once you have your track loaded up in Logic Pro, it is time to think about using a compressor to further control your dynamics and glue everything together. However, you shouldn’t by any means overdo it: in mastering, compression should be used as subtle as possible. For this stage, we will be using Logic’s stock compressor.
The Different Compressors Inside Logic
You probably know this by now but if you look at the top of the plugin’s interface, you will see that there are different types and flavors of compressors as well as emulations of famous units (Platinum Digital, Studio VCA, etc).
You can experiment with different settings, but for mastering, we recommend the Platinum Digital or the Vintage VCA.
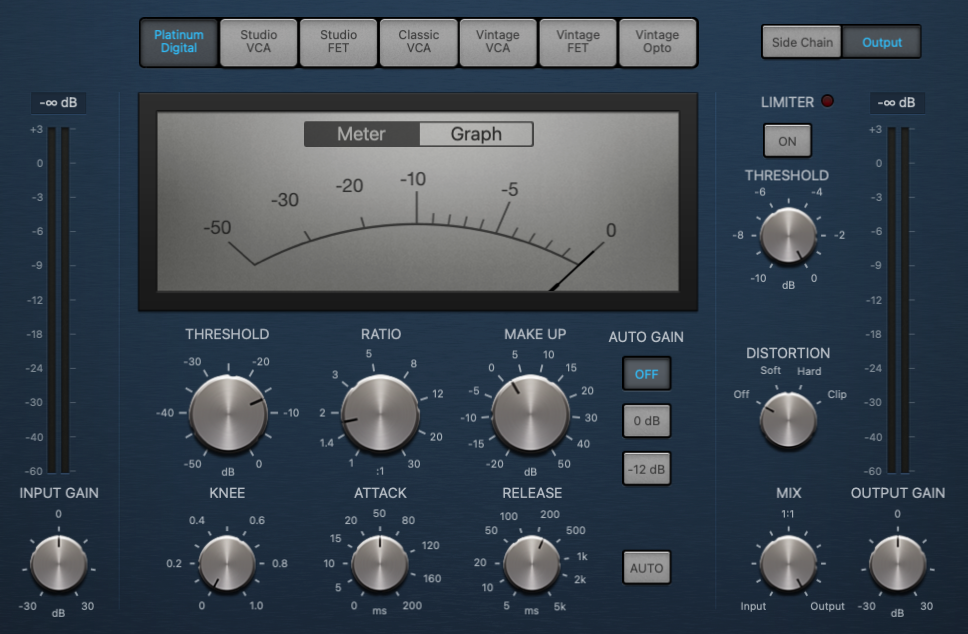
Platinum Digital
The Platinum Digital is Logic’s original compressor, not based after any analog unit, and it is designed to be as transparent and clean as possible.
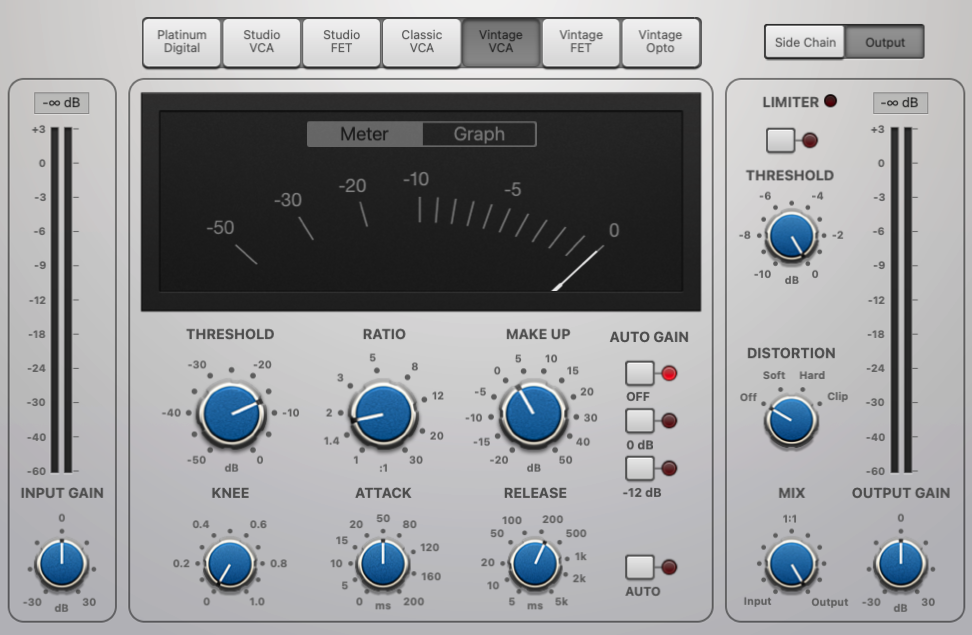
Vintage VCA
The Vintage VCA is an emulation of the famous Solid State Logic compressor present in the SSL 4000 Series channel strip, and it is famous for its ability to glue everything together and give your music extra analog mojo. That’s why it is used extensively for mastering.
The best choice will really depend on what kind of sound and style you’re going for. The standard Platinum Digital is an all-around workhorse, but if you feel like your track is sounding too digital or harsh, it may benefit from the subtle coloration of the Vintage VCA.
Adjusting Your Compressor Settings
Once you have the style you’re going for figured out, turn off the Auto Gain option and, as a rule of thumb, keep your Ratio at 1.5:1 to 2.1:1 (you can adjust it later). The most important part now will be decreasing or increasing your Threshold knob until you see a -1dB to -2dB reduction on the main meter/graph inside the plugin.
The Threshold will define when your compressor will start working. For example: at -20dB, it will only be engaged when your audio is above that level.
Now it is time to set the Attack and the Release. You’re gonna have to listen carefully for this one while adjusting. For mastering purposes, try keeping the Attack anywhere from 30ms to 100ms depending on your song. Shorter settings will smack the transients harder but longer ones may give your mix a little extra impact.
The Release setting is gonna determine how early or late the compressor will stop working. The parameter should be set according to the beat: not too short so it doesn’t give your song a pumping effect, but not too long that it squashes everything.
Start with a setting of 100ms to 200ms and work your way up. A great tip is to pay attention to kick and the snare when setting the release since they are the instruments that will impact the transients the most.
It is worth noting that the most important thing when setting your master compressor is using your ears. Don’t rely solely on meters. Here is a video from In The Mix to help you hear the subtle nuances of compression, both in mixing and mastering:
How To HEAR COMPRESSION – Music Production
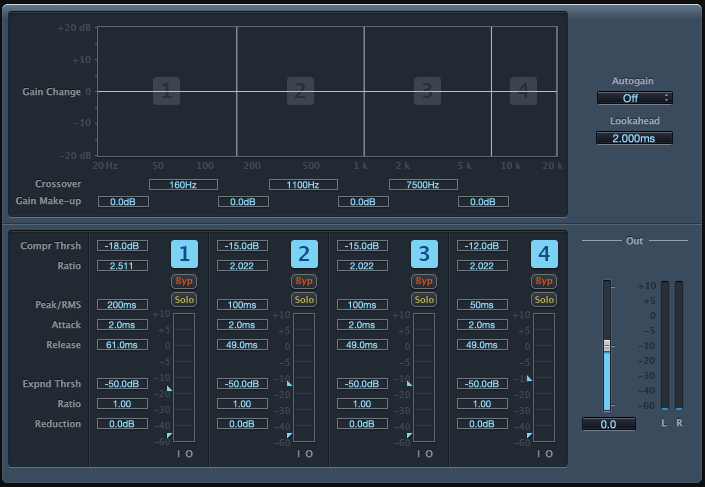
Extra: Multiband Compression
You can also use the Multipressor for even more control over your sound. The plugin allows you to use different settings of compression for different frequencies. For example, when you only want to compress your low/bass frequencies to control the bass and the kick.
The plugin is very simple to use. It is divided into four sections and you can tune the frequency using the main upper panel. Below that, you will see the same controls that you would find in a standard compressor.
Eqing
Now, let’s talk about eqing. Just as with the compressor, you should use the equalizer very subtly when mastering. It won’t work for solving frequency problems that are too specific (that should be dealt with in the mixdown).
Types of Equalizers
There are two main types of stock equalizers we can use for mastering in Logic Pro: the Channel EQ and the Vintage EQ Collection ones.
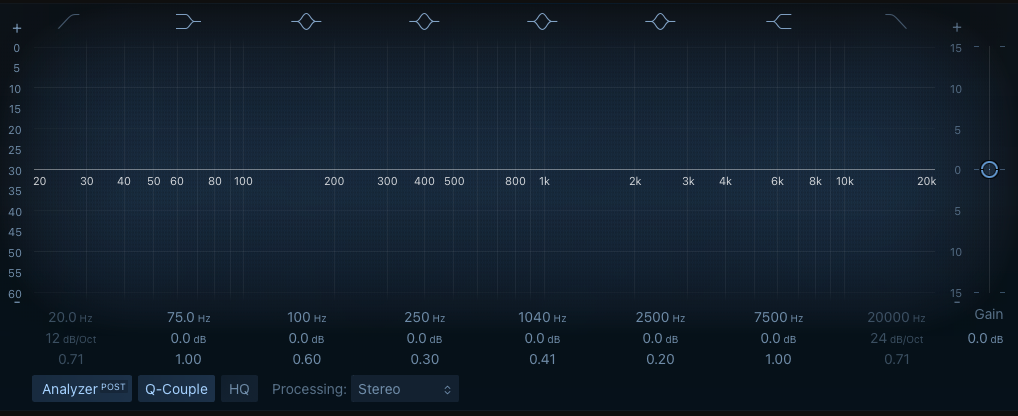
Channel EQ
The Channel EQ is parametric and more surgical. It will give you more control over your frequencies. This plugin is also very transparent and clean, meaning it won’t color your sound: it is a workhorse. However, the added functionalities make overdoing it much easier so be careful.
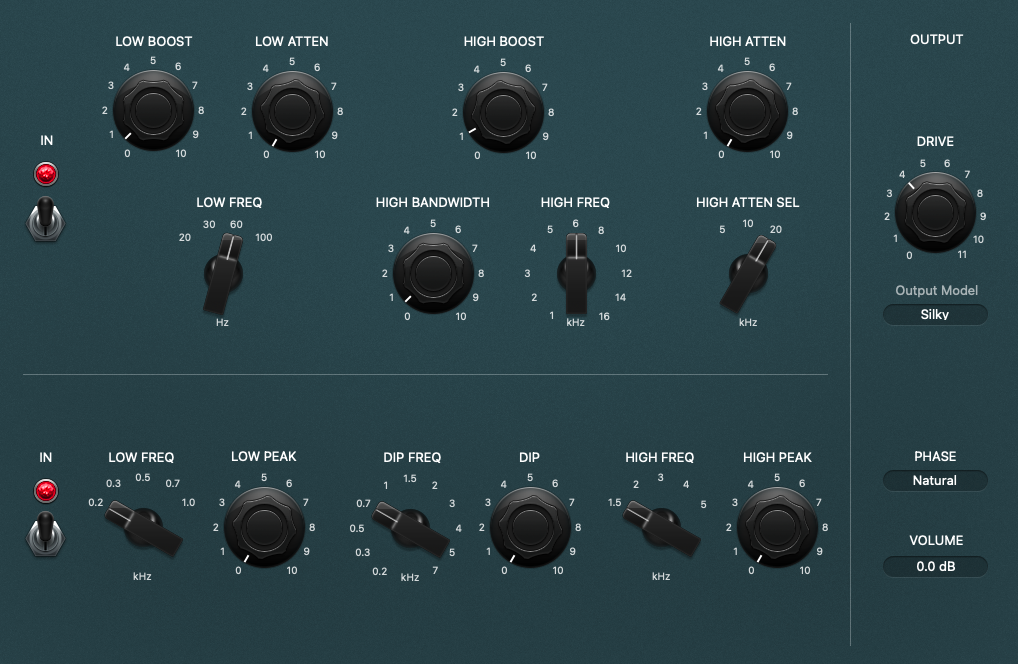
Tube EQ
The Vintage EQ Collection (semi-parametric) plugins are modeled after famous real units. The console, graphic, and tube EQs are based on Neve, API, and Pultec hardware EQs, respectively. The benefit of using them is that they add a little bit of analog color to your sound and the stripped-down style makes them less prone to exaggeration – perfect for mastering.
How to Equalize your Master
Whether you’re using a parametric or semi-parametric eq, keep your boosts and cuts at a maximum of 2dB. Also, make the Q range as broad as possible so the result is smoother and more consistent.
Compare your song to your reference and check for any frequencies that would benefit from an extra boost. A slight boost at around 8kHz using a high-shelf setting should add a little bit of brightness to your master; As well as one using a low-shelf at 100kHz for bringing attention to your bass sound.
Tip: Use the Drive Knob on any of the plugins of the Vintage EQ Collection to apply soft saturation to your master.
Saturation (Optional)
Saturation is an optional step that can give your sound extra perceived loudness and analog mojo by distorting the sound very subtly. There are a few ways you can do this inside Logic.
The first option is to use the already mentioned analog compressor emulations (look for the Distortion knob on the right) and/or the equalizers from the Vintage EQ Collection (Drive knob). These are modeled after real analog units.
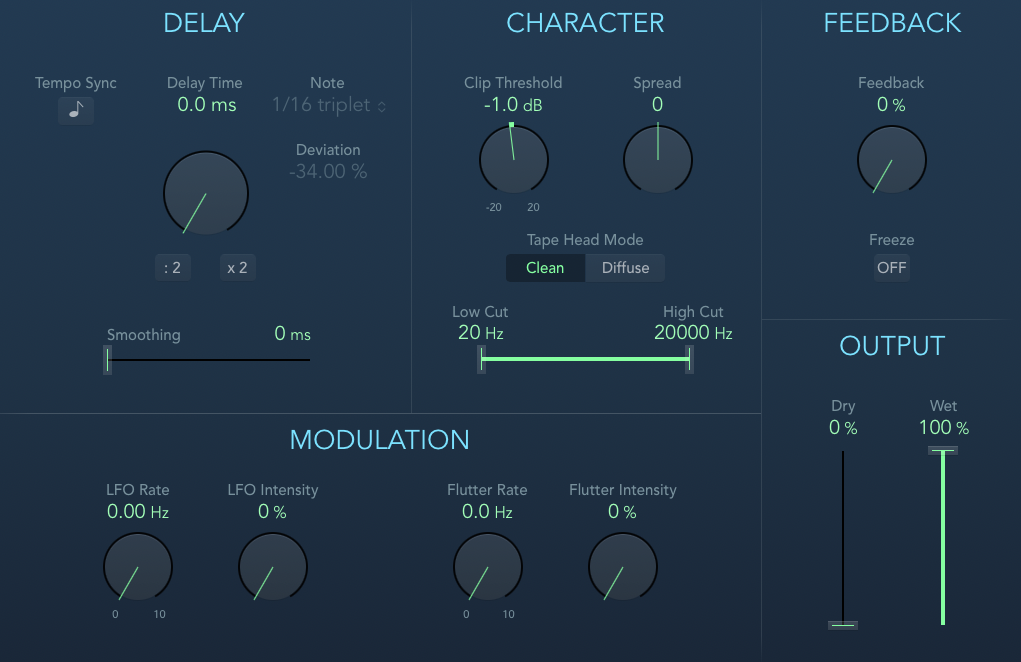
There is also a feature in the Tape Delay plugin that will work. Under the Character section, note the Clip Threshold knob. Dial it back very carefully to add some tape saturation to your sound, but keep it to a minimum. Turn off the Delay section, set Dry to 0% and Wet to 100% before. You may also download the free Saturation Knob plugin by Softube.
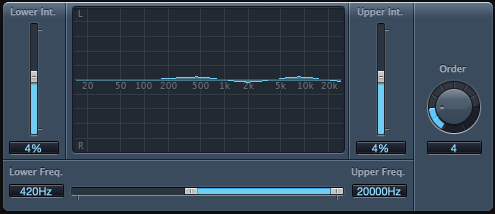
Stereo-Widening (Optional)
This type of plugin can be used to enhance the overall stereo image of your audio. You should go about stereo-widening very carefully as, if used incorrectly, it could throw your mix all over the place and make your bass sound weak, as well as cause phase issues.
If you still decide to use it, just as with most things in mastering, keep it to a minimum. Load the Stereo Spread plugin and set your Lower Freq. parameter at least at 300Hz so it doesn’t impact your low end. Keep the Lower Int. and the Upper Int. at a maximum of 10%. Set the stage to 4 or 5.
Limiting
Finally, a limiter will catch the loudest transients in your song while increasing its loudness to standard levels. Limiting is somewhat similar to compressing, but in a much more aggressive way: these plugins will squash any sound that exceeds the threshold, enabling you to have more perceived loudness without clipping.
Limiter vs Adaptive Limiter
There are two plugins for this job inside Logic: the Limiter and the Adaptive. With the first one, you will have to dial the release by yourself, as opposed to with the latter, which will automatically adapt the value based on your audio signal.
Both can do a pretty good job but the Adaptive one will sound more natural on most applications so we recommend going with it.
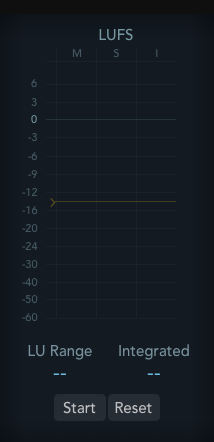
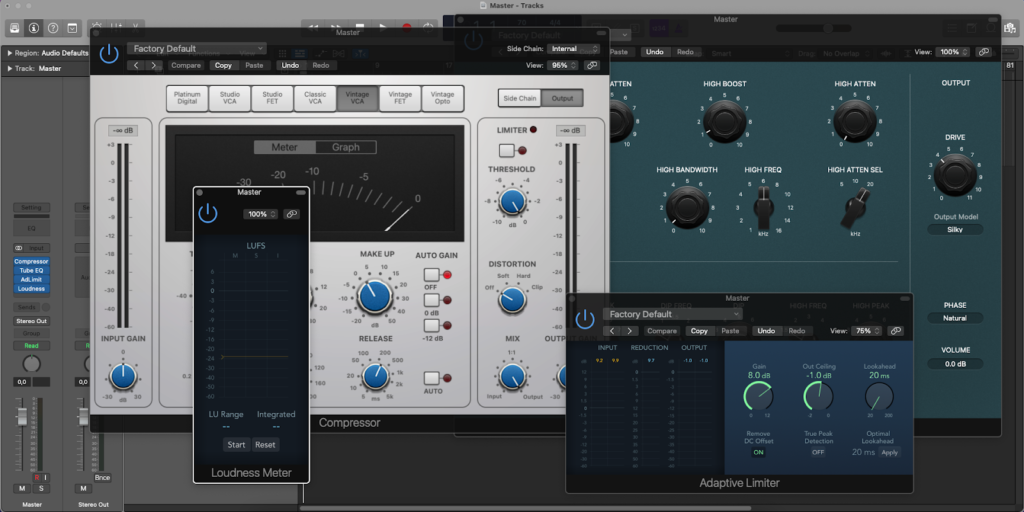
Before You Start – Lufs Metering
After you load the Limiter plugin into your project, insert the Loudness Meter afterward so you can see your audio volume in Lufs. Basically speaking, it is the kind of metering used by streaming services and audio platforms to standardize levels.
What each platform does is automatically turn down the gain of any song that is louder than a certain value, so as to create a better experience for the listener. This value will vary depending on the service. Spotify, for example, normalizes everything to -14 Lufs.
Tip: Loudness Penalty website helps you know if your track’s volume will be turned down by the different streaming platforms.
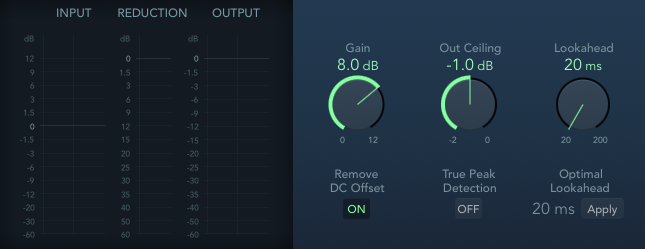
Adjusting Your Limiter
The first thing to do after you load the plugin is to set the Out Ceiling value to -1dB. This is a safety measure to ensure better playback of your song through different systems without clipping.
Now, put the Loudness Meter side-to-side with your Limiter window and adjust the Gain knob until your audio is at -14 to -10 Lufs. Check again if your song isn’t clipping.
Exporting Your Master
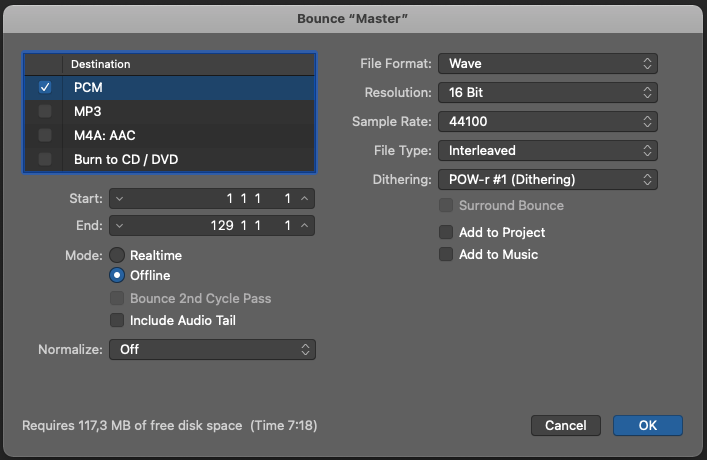
After your track is mastered and you’ve double-checked everything, it is time to make the final bounce. The process should be simple: export your track to 16-Bit WAV or AIFF format, but you need to pay attention to a few things.
If you were, until now, working with a 24-Bit or higher bit depth in your project, you will need to apply dither in your final bounce so that there aren’t any processing errors when converting your mastered files to 16-Bit (the standard for MP3 format). What dithering does is apply low-level noise to your sound, avoiding any data or quality loss.

Bonus Tip: Test Your Master With Different Listening Systems
This is a tip that will also apply for mixing. Be sure to bounce different versions of your track and test how they sound across different listening systems. For example headphones, earbuds, small speakers, and the car stereo.
One of the major goals in mastering and mixing is to make sure your track sounds good across a wide variety of equipment and environments. Sure, it is impossible to achieve a perfect result, but if you feel like your master is not sounding as impactful in your car stereo as it is in the studio, take a moment to adjust your parameters until you find a common ground.
Bonus: Free Plugins for Mastering In Logic Pro X
Even though Logic Pro will offer you a complete set of plugins, you can find some great additional free ones to aid you both in the production process and to take your masters to the next level. Here is our selection:
Analog Obsession CHANNEV

Channel-strip plugin with built-in equalizer, compressor, tape saturation, and limiter sections. An all-in-one solution.
Analog Obsession BUSTERse
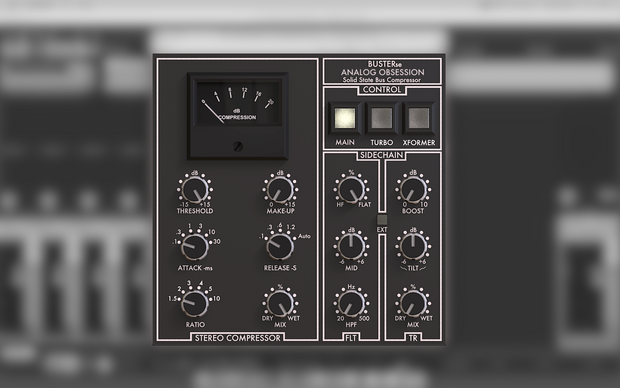
Compressor plugin inspired by SSL units. Works very well for mastering.
Voxengo SPAN
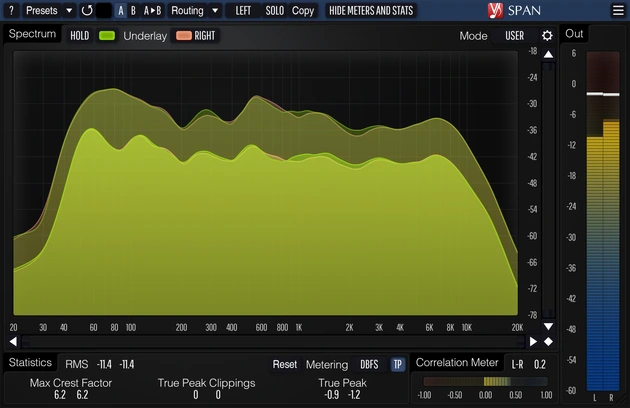
Frequency spectrum analyzer plugin.
Dotec-Audio DeeSpeaker
A simple monitor speaker simulation tool. Great especially for those mastering with headphones.
TBProAudio Isol8
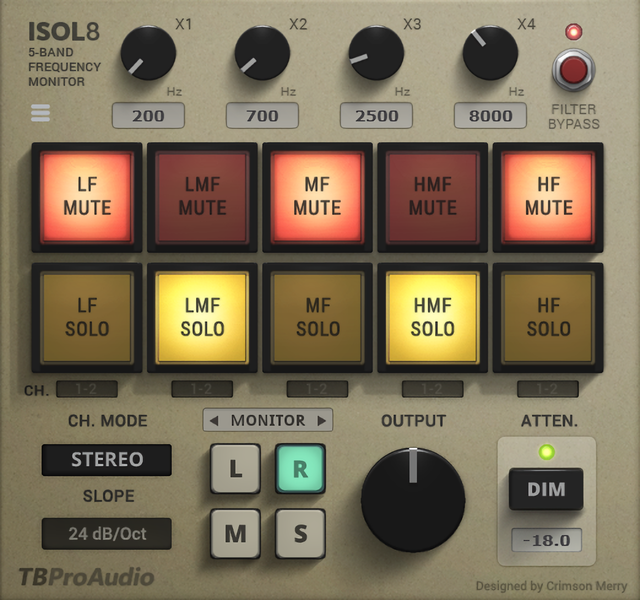
Isol8 gives you a wide range of monitoring options. You can, for example, solo or mute a group of frequencies or see how your songs are sounding in mono.
Tip: Also check other DAW options at Logic Pro X Alternatives.

Conclusion
These were our tips on how to master in Logic Pro X. It is worth pointing out that mastering isn’t an exact science so take this article as a guideline. Since each track is a different case, producers should train their ears and skills extensively to achieve a professional final result on their masters: it is all about how many hours you put into the practice.
With that being said, don’t be afraid to reach for a professional audio engineer if you don’t feel comfortable enough with mastering your own songs or need some guidance along the way.
Please make sure to check all of our related Logic Pro articles to level up your production and mixing/mastering abilities. Don’t hesitate to contact us for further discussion or if you need any help with the subject.
Ian Sniesko is an experienced music producer and musician who loves to share his knowledge about the best audio equipment for making and enjoying great music. For the past 6 years, Ian has written extensively about the audio equipment industry and has contributed to many of the top music magazines.