FL Studio by Image-Line is DAW that makes it easy to record vocals and other musical instruments.
Although the actual task of recording vocals itself is never straightforward. There are a few complexities behind capturing the best vocal sound.
This tutorial gives a run-through of how to record vocals in the studio, explaining what you need, and technical considerations.
Recording vocals requires some equipment, preparation, and an understanding of how both acoustics and the human voice work. This tutorial explains everything you need to know to start recording vocals in FL Studio.
Also Read our tutorial on Fl Studio.
Steps to Record Vocals in FL Studio
Let’s have a look at the steps from start to finish.
An outline of how to record vocals in FL Studio:
- Set up the room.
- Set up the microphone.
- Set up the software and audio device.
- Test signals.
- Refine setup.
- Record vocals.
First, we will look at the equipment needed for the recording process.
For this tutorial you will need:
- A computer/laptop.
- A version of FL Studio.
- A microphone (XLR or USB).
- Audio Interface (if using XLR Mic).
- Cables.
- Headphones.
- A room or recording space.
Here are some additional extras. These aren’t necessarily essential but can make the process more efficient, or acoustically sound.
- Acoustic Foam Soundproofing
- A microphone stand
- A pop filter/pop shield
- A preamplifier.
Step 1: Buy a Microphone, Audio Interface & Accessories
The most important piece of equipment for recording vocals is the microphone… There are a few options here.
USB vs XLR Microphones.
The easiest option is a USB microphone, these plug straight into the computer’s USB port and do not require an external audio interface. They can record directly to the software. The issue with using a USB mic is that the quality will not be as good as using a mic and interface with preamps.
The other option is using an XLR Microphone. These need to be used with an audio interface with XLR audio inputs. Some mics are Condenser microphones, which require +48V Phantom power (Dynamic mics do not). Using an XLR and interface setup will achieve better results than USB microphones.
Condenser vs Dynamic Microphones.
Condenser microphones tend to be more responsive thanks to their sensitive design. This makes them better suited to studio recording situations. Dynamic mics are less responsive, which makes them well suited for live performances, or on-stage recording conditions. A dynamic mic will be less likely to feedback, at the expense of some responsiveness.
Condenser mics are generally a better choice for recording vocals over dynamic mics. Although some dynamic mics can sound great for vocals. Condenser mics tend to pick up more detail and are more sensitive to frequencies in the human voice. Although really you should experiment with multiple microphones to find one that matches the vocalist and the music involved.
Below are some affordable microphone solutions.
Mic Selection
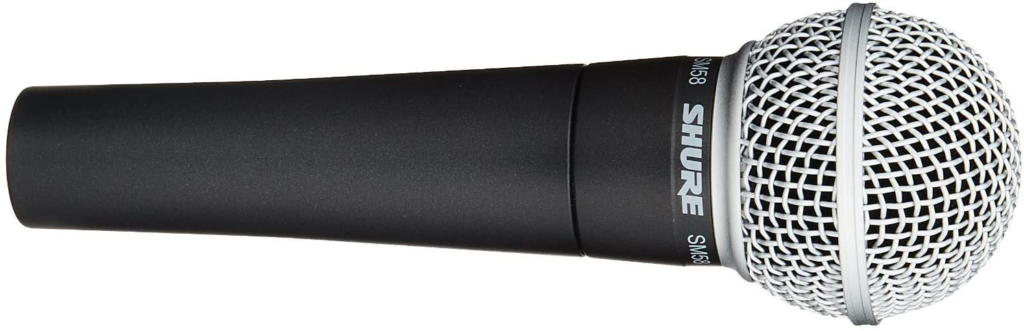
- Shure SM 58. XLR Vocal Dynamic Mic- £83
- No products found. Professional USB Mic – £169
- Affordable USB Mics – £30
- AKG C414 Condenser Studio-Quality Condenser Mic – £619
- Neumann U87 AI: Industry-standard studio vocal mic – £2300
These are some of my favorite microphones for vocal recording. The SM58 is a great beginner dynamic mic. These are super sturdy and built to last, the quality is good enough for voices and other instruments.
Professionals and semi-pros might consider something like the AKG C414. This is a studio-quality mic, with a few configuration options. Super flexible and I think they have a distinct and beautiful tone for vocals.
OK, the Neumann is not affordable, but these are some of the best vocal mics around. If you get a chance to use one of these, please do!!!
Notes on choosing microphones:
Choose a microphone that works with your budget.
It doesn’t have to be the most expensive, it should be what matches your needs.
Ozzy Ozborne, the frontman, and singer of Black Sabbathreal-time favored the SM58. During album recording sessions, even when they had HUGE budgets, and access to multi-thousand pound, vintage deluxe microphones, Ozzy stuck with the humble SM 58. It goes to show it’s not what you have, it’s how you use it. Even using a below $100 mic, Ozzy achieved fantastic results and felt the mic suited his performance style and vocal tone.
It is better to work with an audio interface and XLR mics over a USB microphone.
They are more flexible, sound better, and the audio input device of an audio interface generally works with more than just microphones. A USB microphone will work in a pinch, or for doing rough scratch vocals, but for serious recording, XLR microphones are the way.
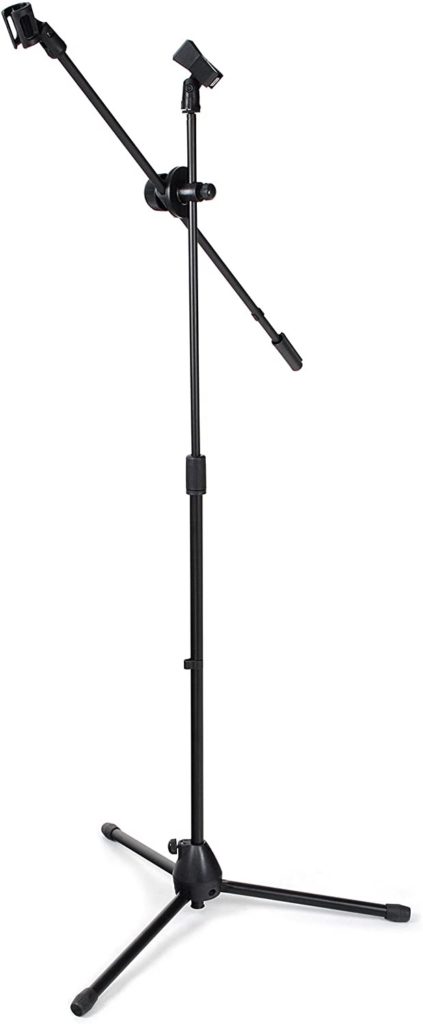
Boom & Stand Selection
A Microphone stand is also needed to hold the mic. Holding the mic in your hands is not a good idea and can capture bumps in the recorded audio. You are more likely to get inconsistent volume levels as the singer moves the mic closer and further from their mouth.
Mic stands are relatively inexpensive and definitely an essential investment for anyone serious about recording quality. Without using a stand, it’s unlikely the final quality will be pro-grade.
You can either get floor stands, or desk mounted. I recommend using floor (boom) stands.
Always get an adjustable stand. This way the height can be changed to match your posture and body.
- Basic Microphone Boom Stand £18.49 – (recommended)
- Desk Mount Mic Stand £15.99
Headphone Selection
Headphones are also needed when working with microphones if you want to monitor the recording in real time from the same room.
Otherwise, there is the risk of feedback being created as the input signal loops from speaks to microphone.
Choosing between open and closed-back headphones is largely preferential when recording solo vocals. If recording in loud environments then closed-backs are recommended.
Here are our headphone recommendations:
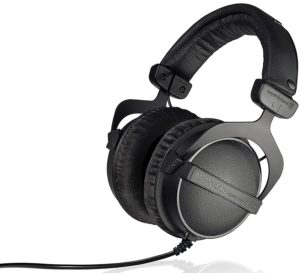
- Beyer DT 770 Pro – £130
- Beyer DT990 Pro £108
- Samsung SR 850– £50
- Shure SRH440 – £59
My favorites are the DT770 or DT990. The quality is superbly accurate. I’ve never found headphones more comfortable than these. They can be worn throughout long recording sessions (4+ hours) without creating ear fatigue. You forget you’re wearing headphones.
Some musicians prefer to use in-ear-monitors. These come in wireless variations which are perfect for stage performances.
Additional Accessories
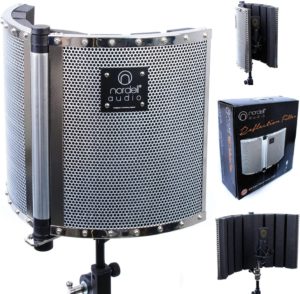
Pop Filter: These are useful accessories that help to remove plosives from vocal recordings. Microphones are very sensitive in particular frequency ranges. S, P, T, and B sounds are prone to creating low-end bumps which disturb recording quality. It’s not an issue of the utmost importance, but using a pop filter can make a noticeable difference.
Small Pop Filters (~£10) do the job.
Alternatively larger shields (£30-100) improve isolation and reflection reduction.
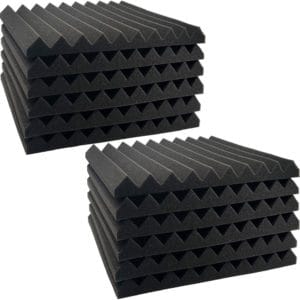
Acoustic Foam Soundproofing. Using soundproofing foam can help minimize reflections and tighten up a vocal sound. This can particularly help when recording at home, in sub-par acoustic conditions. Putting up some foam deadens the reverb and declutters the high frequencies of a recording. Try to cover any hard reflective surfaces and walls in the recording space.
Basic Acoustic Foam Pack – £17
Audio Interface: If you choose to go down the route of using XLR microphones, you will need to buy an audio interface with the right connections.
Audio Interfaces are essential tools for music producers, particularly those who record real instruments. Choose an interface that meets your needs.
Check that the monitoring options provided enable the kind of recording sessions you want to run.
Some good beginner interfaces include
- Scarlett Solo + Accessories £140
- Behringer UMC22 – £37
- PreSonus Studio 24c – £133
- SSL 2+ – £210

Buying a well-made interface will improve recording quality. Better interfaces have better components inside, this translates to a higher quality, cleaner recording. The preamps in more expensive models tend to sound better and can apply more gain.
If you plan on using a condenser mic, make sure the interface can provide +48v phantom power.
Once you have all the necessary equipment, you’re ready to start recording! Although first, we must configure the software and any audio devices.
Step 2: Audio Driver Settings
The Audio Device Driver Settings need to be configured properly for the best results.
Latency Compensation needs to be adjusted if direct monitoring is being used.
For Windows users, you may need to configure the ASIO Panel to recognize your interface.
FL Studio Asio settings are easy to set up.
You may need to enable microphone access permissions in your Operating System.
We need to select an input device in the audio settings to use as our recorder. You can use multiple input devices.
From the top menu, select Options > Audio Settings.

Open system preferences and make sure the audio interface is connected.
From the “Input/Output” drop-down, select the audio interface you wish to record through. If using a USB Microphone, select that. If using an XLR mic with an interface, select the interface driver.
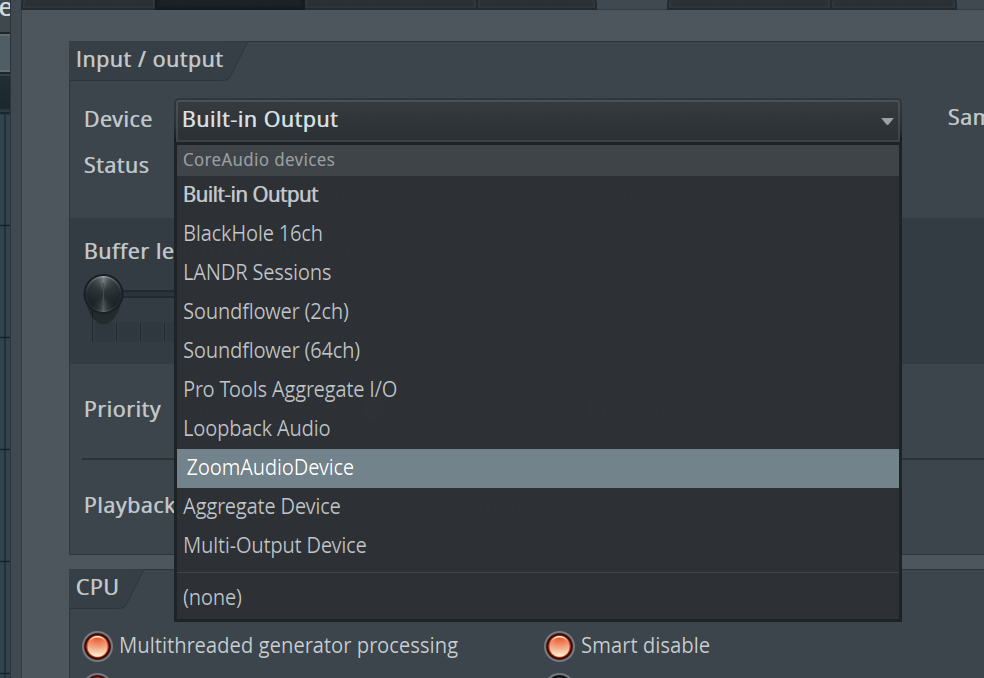
Once the interface is engaged, we need to configure its settings properly.
Latency
Latency is a time delay between the processing of digital sound and its audible playback.
Computers insert latency to allow time for the audio to be processed before playing out the speakers. If the latency is too small, there will be audio glitches and artifacts as the computer struggles to parse the information in time.
Understanding how Latency compensation works are important for running a smooth recording session.
When a vocalist is singing, if they use direct monitoring (listen to themselves sing through headphones), the monitoring needs to be on time. If there is too much latency, the monitoring will lag behind the vocalist. This is distracting and makes it hard to sing properly.
If you have lots of CPU-intensive plugins in your project, consider deactivating them during recording. This allows the latency to be brought down before glitches occur.
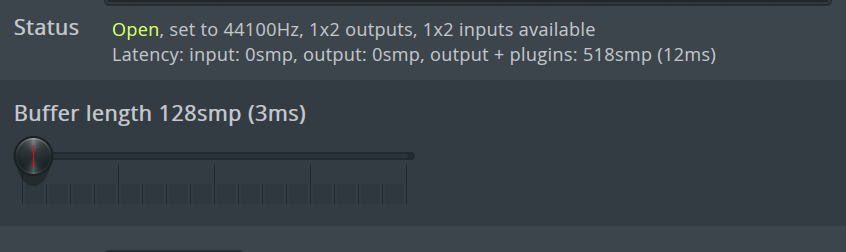
The ideal latency length for live monitoring an incoming signal is less than 128 samples.
To access latency in FL Studio, choose Options > Audio Settings. The latency is set from the Buffer Length Slider.
Step 3: Set Recording Filter to Record Audio
The Recording Filter is a panel where we choose which elements we want to record in FL Studio.
Simply right-click the red record button to open the Recording Filter.
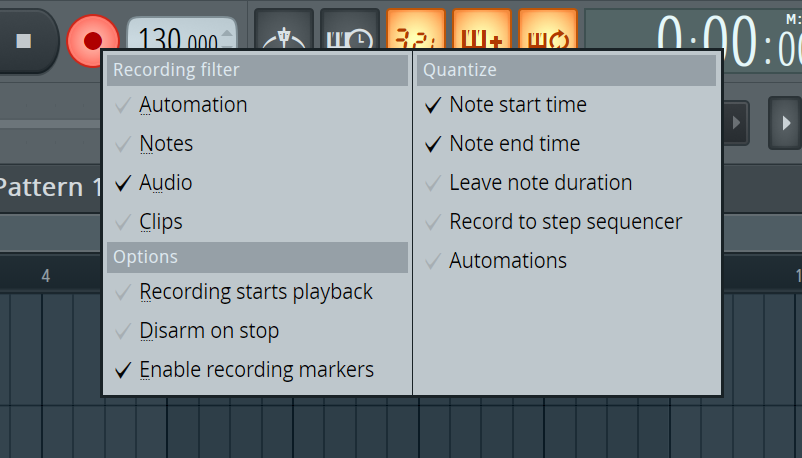
We have 2 choices here. If you’re going to use Edison, the only filter that needs to be active is “Audio”.
If you want to record vocals directly to the playlist, choose “Clips”.
The different processes are explained in more detail below.
If you are recording other elements like midi keyboards (Notes) or automation then check them too.
Now the software side of FL Studio is mostly configured, it’s time to plug in the mic.
Step 4: Connect Your Mic & Choose a Mixer Track
Now we need to plug the mic in and connect it to a mixer track.
Turn the gain down to 0 on your interface before plugging in the mic.
Plug one end of the XLR cable into the interface, the other end to the mic. Try to use the first input for convenience.
If a condenser microphone is being used, enable +48V phantom power on the interface.
Turn up the gain a little bit, and tap the microphone. Hopefully, you will see some movement on the interface’s metering panel, showing it is receiving the input signal.
Now the mic is connected, it’s nearly time to record our vocal clip!
Step 5: Record Into the Playlist
First, we will look at recording sound into the Playlist, this is a bit different from Edison which is explained afterward.
Arm the Mixer Track & Set the Save Path
Now we need to arm a mixer channel to use for recording. Pick a mixer channel to record the vocal to.
- Record Arm the selected mixer track by clicking the small circle button at the bottom of the track.
If you want to record two tracks or more at the same time, arm multiple mixer channels. The master track can also be armed.
- Select Audio Input. Choose an audio input in the mixer input menu. This should be the mic input connected to the interface.
If recording multiple channels, an input will need to be selected in the mixer input menu for each microphone.

At this point, the project should be saved. File > Save As…
This way the recorded audio clips will be stored safely if the FL Studio song project crashes.
Adjust Mic Input Gain
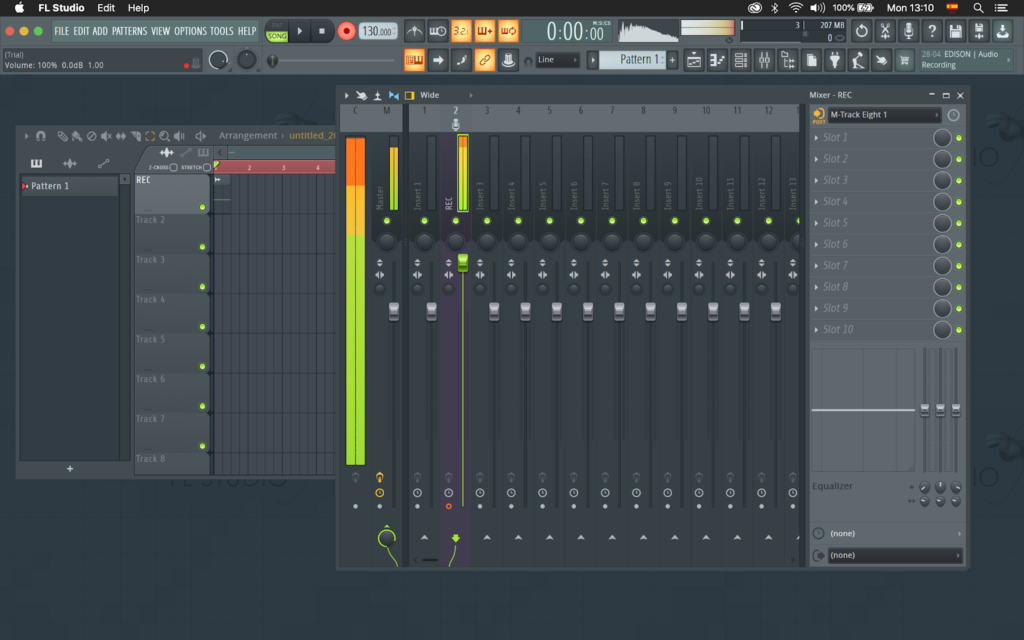
Before recording, we want to adjust the mic’s input gain to get the correct level.
Running the gain too hot can result in distortion by overloading the input. We do not want to record a distorted signal unless it is intentional for sound design. But generally not for recording vocals.
If you see any red indicators, turn them down. If the meter reaches 0db, turn it down.
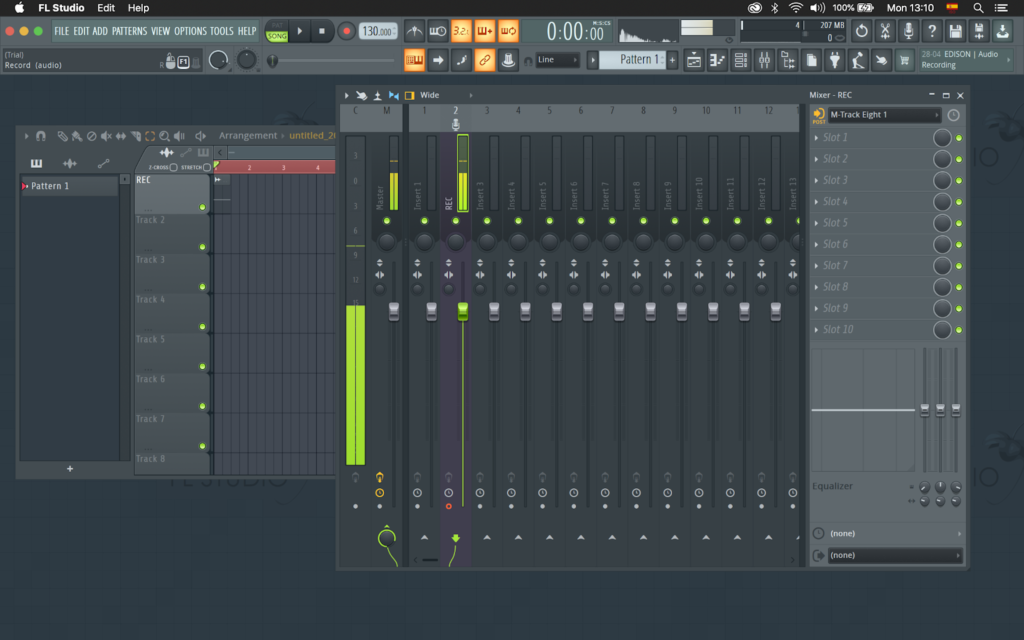
If the signal is too quiet, we end up with a poor Signal-to-Noise Ratio. This results in noisy and unclear recordings.
The sound dB level should be around -12db for recording. Adjust the input gain on the audio device, and test if the vocalist is reaching the right level.
Get the vocalist to try singing at their loudest level. If this clips the input then turn the gain down.
Once the gain is adjusted, it’s time to record audio.
Start Recording
Before starting the recording in FL Studio, select the area of the playlist timeline where the vocal track needs to be recorded.
To start a recording, click the red record button in the transport section of the top menu.
Select “Audio, into the playlist as an audio clip”, from the drop-down menu.
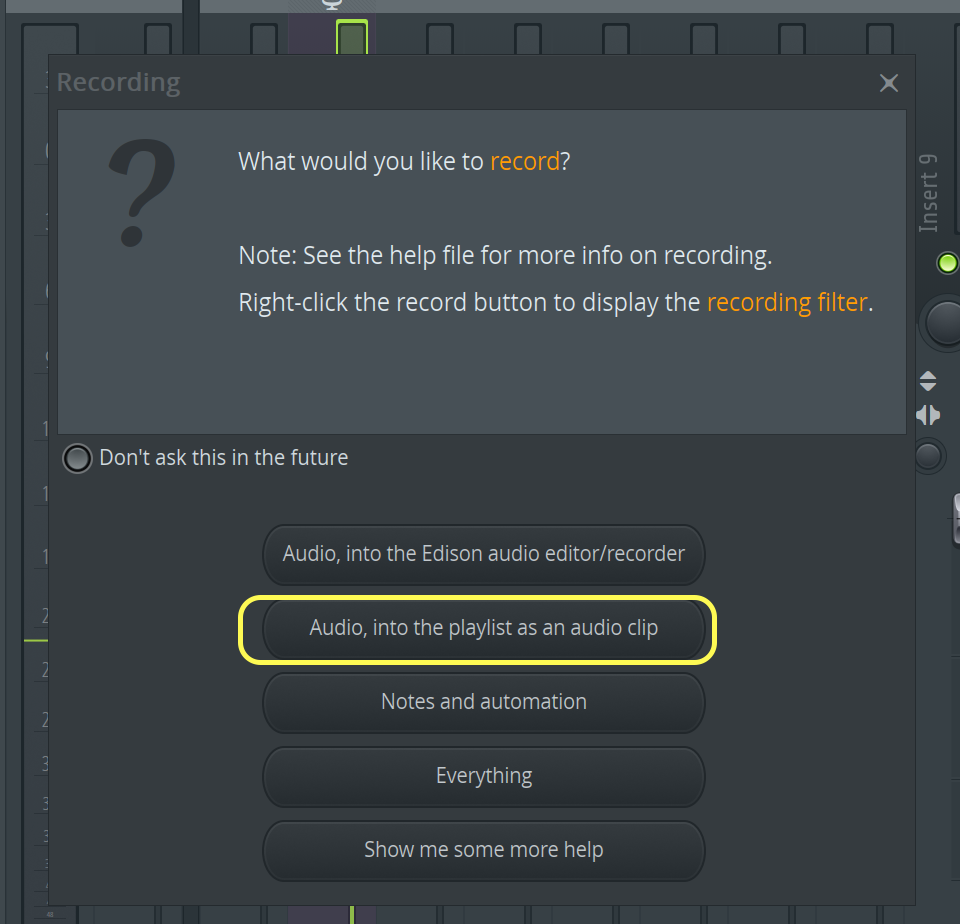
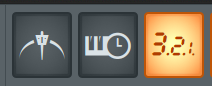
Change any metronome or count in settings with the buttons at the top next to the FL Studio transport section. Having a count-in or metronome helps the vocalist lock into the tempo of the song before singing.
Now, hit play (Spacebar) and the microphone will be recorded to an audio clip.
Press Spacebar to stop recording.
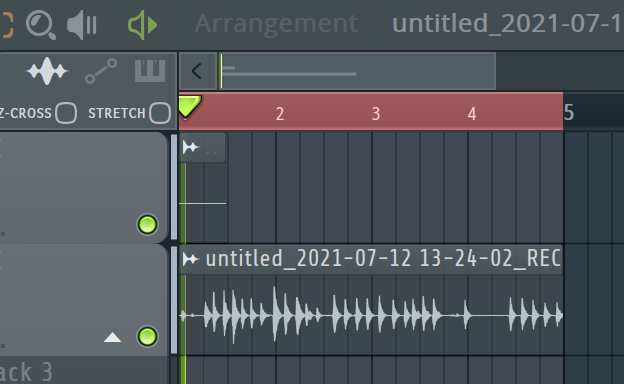
The new recorded audio clip will be placed on the playlist timeline.
Any armed audio tracks will now be filled with their recorded audio clips.
Feel free to listen back to the recorded vocal part!
Alternative Step 5: Record Into Edison
The other option for recording vocals in FL Studio is recording directly into Edison, FL Studios audio editor.
This is different from recording as an audio clip. It provides more detailed audio editing tools.
Rather than recording to the FL Playlist as an audio clip, the Edison editor provides more advanced and detailed audio editing tools.
The process of configuring audio devices is the same for Edison and Playlist. You still need to arm a mixer track and select its audio input.
Hit the record button, this time selecting “Audio, into the Edison audio editor/recorder” from the drop-down.

Add Edison to Mic Input Track
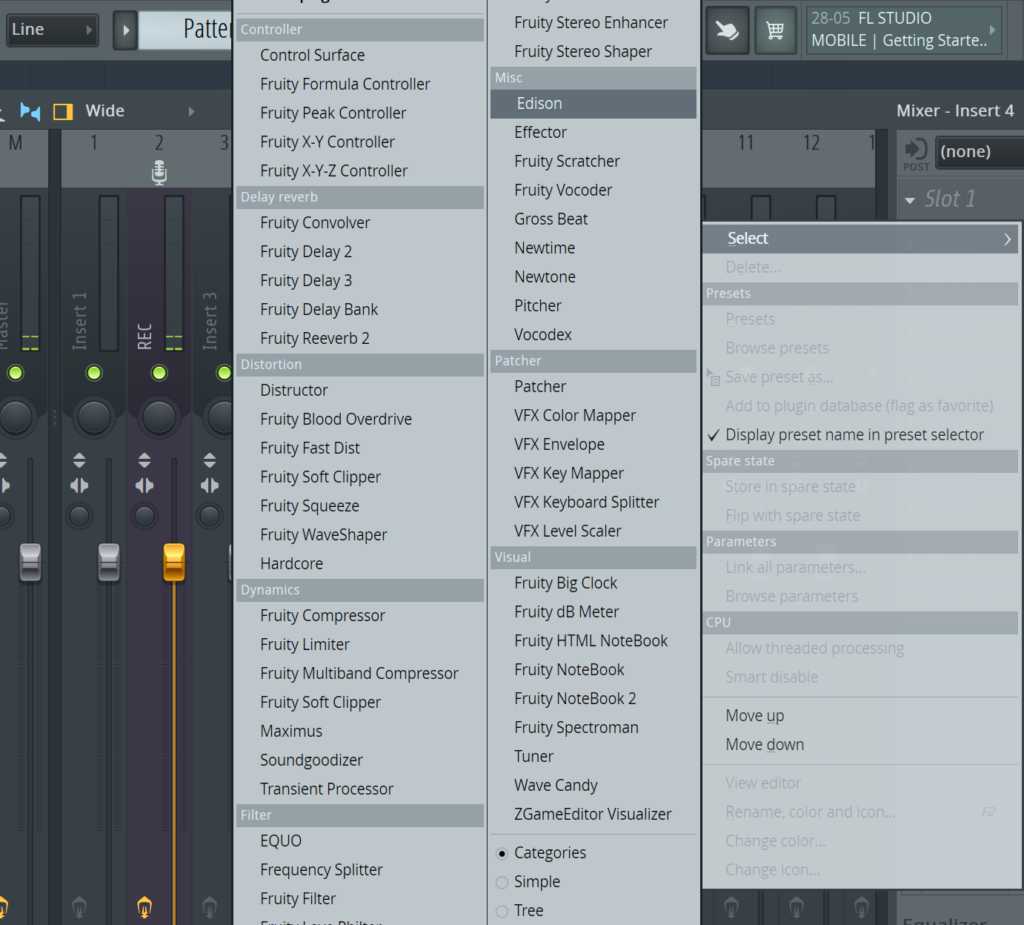
Alternatively, Edison can be added to a mixer track as an insert. Click the insert slot on the armed mixer track, and select Edison from the Misc section. This will create an instance of the Edison plugin on the mixer track.
Adjust Mic Input Gain
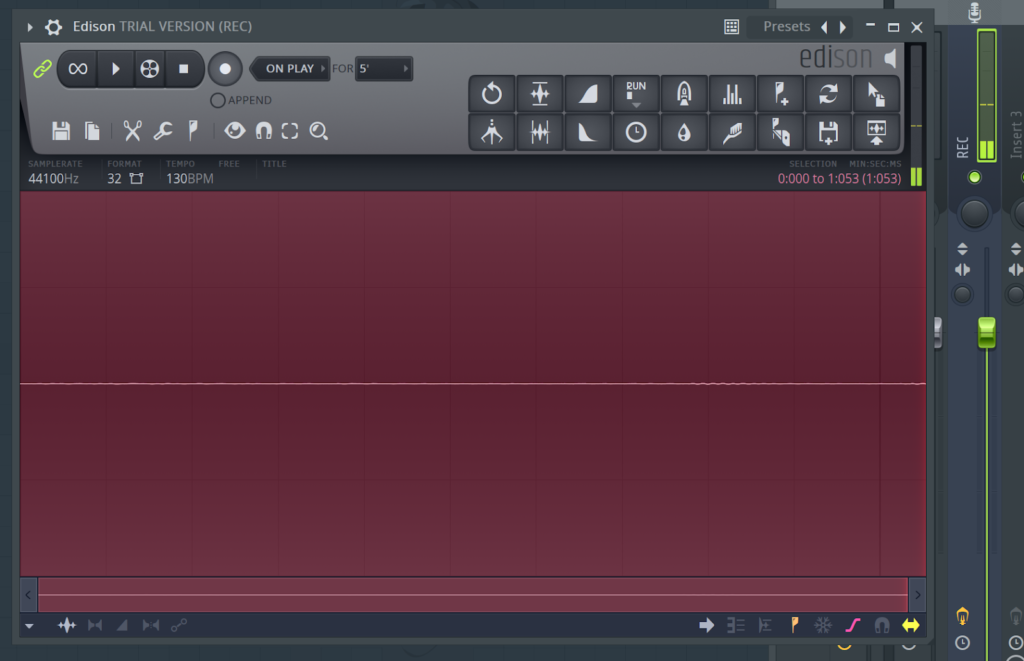
The FL Studio Edison recording panel will appear. Check the input gain at the top right of the window.
You may need to adjust the gain knob on your audio device. Aim for around -12dB signal peak. Avoid distorting the signal, check the display on a mixer channel.
Start Recording
You can now record vocals by clicking the record icon at the top. This will activate the recording.
If you want the backing track to play whilst singing, make sure FL Studio is in Song mode. Then in Edisons, select “On Play” as the recording trigger. Now, when the FL Studio project is played, audio will be recorded to Edison.
Once finished, press space, or click the recording icon again to stop the recording.
Edit & Send to Playlist/Channel Rack
We can now use Edison to edit the recordings.
Edison has several powerful editing tools, including normalization, fades, reverb, EQ, tuning, trimming, time-stretching, denoise, auto-slicing, and scripting.
Experiment with each of these tools and learn how you can use them when making music.
A good music producer will tweak their sounds to perfection when making a song.
The Denoise tool can be very useful to clean up vocals in FL Studio that were recorded in poor acoustic conditions.
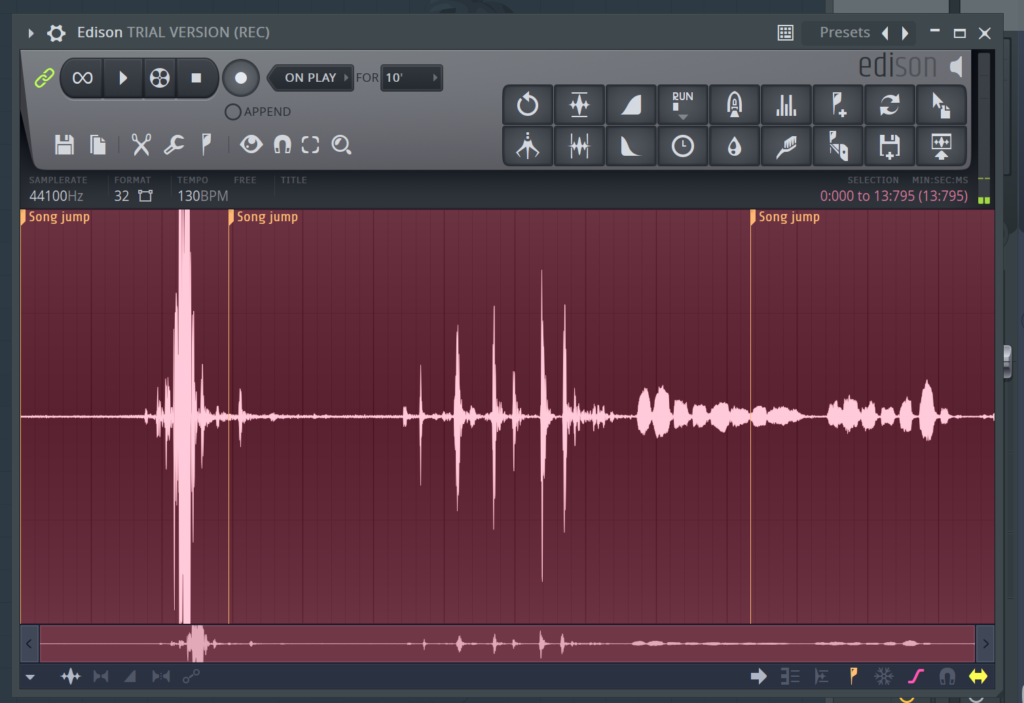
Now we need to send the recordings to the playlist or channel rack. This is the button highlighted below. This sends the audio directly to the timeline.
The button above the highlighted button “Drag/Copy Sample Selection”, is a quick way to move the audio clip anywhere in the FL Studio interface.
Dragging the icon attaches a version of the recording to the mouse, which can be dropped anywhere on the playlist, as a new channel rack channel, or into the browser.
Mac users can also drag recordings directly to the desktop.

More Vocal Recording Tips
- Practice Correct Vocal Technique: Whilst the setup and technical elements are important, none of that will matter if the vocalists’ performance is not up to scratch. Whether it is you, or somebody else laying down the vocal track, the vocalist needs to use proper posture, breathing, and articulation technique. Also, make sure they know the song lyrics inside out before you record.
- Acoustics are key: vocals recorded in an acoustically treated environment are going to sound miles better than vocals recorded in a subpar space. Not everyone has access to a studio, or even their own space, so good acoustics aren’t always an option. Although there are a few things to note that can minimize problems. Try to soften any hard reflective surfaces with blankets. Leave some space behind the microphone, don’t have it too close to a wall, otherwise, the air will bounce back. Try to avoid recording in rooms that pick up traffic and engine noise.
- Mic Placement: Exact mic placement will vary from vocalist to vocalist. Try to record with the mic about 6-12” away from the mouth, slightly below and angled to one side. Experiment with height and angles. Do not have the mic too low so that the singer looks down and closes their neck.
- Proximity Effect: you can research this phenomenon more, but the closer a mic is to the source, the louder the low frequencies are. Use this fact to shape the equalization of a vocal pre-recorder.
Read our post on how to add automation in fl studio and how to put samples in fl studio.
Conclusion
That concludes our FL Studio tutorial on recording vocals.
With some practice, the process becomes second nature and beautiful vocal recordings can be captured.
It can take a while to achieve mastery of all individual elements, but recording good vocals is an important part of being a music producer.
There are several components involved with creating a good vocal track. The hardest being acoustics and vocal technique.
Noah is an accomplished audio engineer with several years of experience producing music for major companies and independent artists. He enjoys sharing his vast knowledge of audio engineering topics to help musicians and music producers create great music.