We all want to get an amazing quality drum sound from a state of the art studio. However, most of us run into the issue of not having access in any way to location like that. Whether it is too pricey for us or the client to afford or just no studios are in the local area. Situations such as these require creativity and ingenuity. Cue, empty rooms and on must learn the proper room mic placement.
The way this whole issue presented itself to me was in a few different ways combined. I have a friend, Byron, who was wanting to record a few songs and he asked me to work with him on it. Byron presented the option to record in an empty room in his parent’s house. Then on top of that, I was asked to create a soundtrack for a short film my former classmates were working on. When I started looking into it and creating the song, I realized I needed real drums for this track to sound just right. So I contacted my friend Byron, and asked if he wanted to play drums for this track and if we could record in the room at his parent’s. Once we got all of that straightened out, we were good to go.
We are going to review the process I went through to get the best sound I could from what I had when recording in an empty room. I have four steps involved with getting the best sound possible for your home recordings: Finding the Room, Placement, Tracking, and Editing.
Table of Contents
Step One – Finding the Room
So this step was easy for me since Byron had already picked out the location, and I made it work with what I had. But if I had not had that option, I would have had to go through a process of elimination to find my location.
The first thing to remember is that not every room is good. It is just an honest fact that your recording space can make or break your track. The best home recording option for a room is an open almost square room with wooden floors. That is, luckily, the room I had to work with. Sometimes you need to throw a rug down for the overall sound, or you need to put something to dampen the sound on the walls. One of the best ways (and cheapest) for an impromptu and temporary fix is to use moving blankets, which are basically big thick blankets that will help deaden a room (and move your furniture without a scratch). For a more advanced solution, you could try some good soundproof foam options.
Now one thing to remember is that everyone wants to get paid. You want to get paid for the quality work you are providing that an amateur could not do. But you also have to remember that if you are using someone else’s space, you need to be willing to pay them or work out some sort of trade for renting the space out. I had a deal worked out with Byron that included the other recordings I was going to do for him. To set the precedent that talent and experience should be paid for, you need to do it yourself. It is important to practice what you preach in the real world.
Step Two – Placement
Placement in this context has to do with more than just microphones. The placement that really matters is right now, is where everything is in the room. The biggest problem you will face is reverb. It can be your friend or enemy depending on where you set up. Most times you would want to avoid setting up in the center of the room if you want to try miking the room for natural reverb. If you are in the center, it does not allow for apt space to create the reverb of the room and can result in a muddy sound in the overheads.
For the placement of the drums, we had the kit set up facing out from a corner in the room.
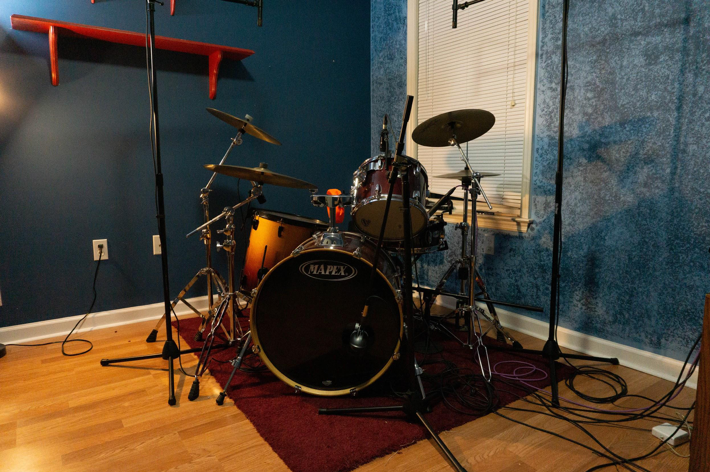
There was a room mic located straight out from the kit. I set it up low so as to best capture the entire kit. With it being placed so low, it picked up the kick, snare, and toms better because the cymbals were not so prevalent.
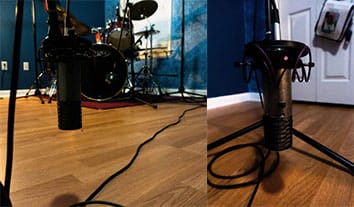
You can notice in the pictures that the room was emptied overall except for what we needed for recording. This is what kept us from unintentionally shaping the sound of the room. From there we close miked every drum and setup the 2 overheads.
Complete Microphone Setup for an Empty Room:
- Kick – Shure Beta 52
- Kick Beater – Shure SM57
- Snare Top – Shure SM57
- Rack Tom – Audix D2
- Floor Tom – Audix D4
- Overheads – No products found.
- Room – Aston Spirit
All of these mics are ones I have accumulated over the years and some were bought just because I had these sessions coming up. They all ran into my Scarlett 18i20 which in turn was connected directly into Pro Tools.
Step Three – Tracking
All of the scouting and setup has led to this point. You actually have reached the tracking phase. In this situation we had to spend almost an hour between getting levels and exact placements for everything to have the sound we wanted. I was just shooting to get the strongest signal without peaking. Simple as that. Once you set the levels, all you have to do, is press buttons and be quiet. Although I would suggest grabbing a pair of earplugs or heavy headphones so you do not come out with ringing ears.
Step Four – Editing
So the final step, once you have successfully tracked the entire session for a song, is editing. This includes, fades, compression, eq, reverb, cuts, everything. For my drums I try not to include too many gates, I would rather just edit out any part that the drum itself is not making on that channel. However, I mainly do that for toms since they are the biggest problem causers. The natural sound of all of the drums miked and with the levels set should sound decent on its own if you placed everything correctly. One tip I will give is to use compression on the drums as well as a drum bus with compression. I myself like to use the CLA-2A compressor plugin from Waves on the toms, kick, and drum bus. It really helps pull everything out and create a clearer, fuller sound. I tried to keep the drums sounding a little light and airy just to match the style of music I was working with.
All of this article is just a look into the way I record in a space that is not really a studio environment. I still use the best microphones I can get my hands on. Equipment does matter, but the key factor to making anything sound professional, is the engineer. I have spent a lot of time figuring out the best ways for miking as well as editing. I try to get the best sounds I can out of every instrument I work with, especially drums. The best saying I have ever heard, and I cannot remember where from, was, “Track like there is no mxing, and mix like there is no mastering.” All of that to say, do the best possible job you can with any step.
Now that you have read all about the project, I included a copy of the final product:
I hope you have as much fun jamming out to these as I did making them.
Jarrett is a hardcore Lover-Jazz Lover-Rock Lover-Blues Lover-just a music lover. He has the hair to match — Jarrett and provides in-depth insight into all things guitar and music engineering.