So, you want to learn how to build an electric guitar from scratch…
From stratocasters to telecasters, electric guitars are a favorite instrument in the music community.
Whether you are an expert or a first-time builder, building an electric guitar is a fun and fascinating adventure. Through the process, you can learn so much about how the instrument works, and why each one sounds unique.
Not only is building an electric guitar a great learning experience, but it also allows you to make a guitar with a unique design. This way you can create custom guitar shapes, headstocks, and your own personalized guitar type.
Keep reading for our full guide on how to build an electric guitar from scratch.
For some inspiration, why not check out our post about the best electric guitars.
Hungry for new sounds?
Fill yourself up with our sample packs!
Including Drums, Keys, Synths, and more.
Table Of Content
- What type of guitar do you want to build?
- What do you need to build an electric guitar?
- How to Build Electric Guitars – Step-by-step guide:
- FAQs
- Summary
What type of guitar do you want to build?

Before jumping into the workshop, it’s important to work out what type of electric guitar you want to make.
There are tonnes of different guitar styles out there. From the Fender Stratocaster to Flying V’s and the Gibson Les Paul or Gibson SG.
You can either copy an existing guitar style or make up your own unique new design.
As exciting as creating a new design is, I think the best idea is to start by copying an existing model. There are a huge amount of factors that go into designing the perfect guitar, and the famous models have been tried and tested for decades.
Copy a popular design and you’re walking in the footsteps of the masters. This way you get an insight into some of the nuances of their guitar designs. It gives you an idea of what design elements are important in guitars, and which are not. I’d recommend starting on something like the Fender Telecaster or Fender Stratocaster. These existing guitar models show you everything you need to learn and are probably your best bet. I recommend making one of these before designing your own instrument, pay attention to all the small details of the construction process.
You can either make solid body, or hollow body electric guitars. Solid-body guitars tend to be a bit easier to make as the process of creating their body isn’t as complex as a hollow one.
Models like Stratocasters, telecasters, and SGs can be a good place to start. These are all iconic guitars that have been designed perfectly. You will learn a lot about guitars by looking at how these are made, and making one yourself!
What do you need to build an electric guitar?
To build an electric guitar, you will need several tools and materials. This section outlines the tools you mighty need for the construction process, and the raw materials the guitar is made from.
Tools needed to build an Electric Guitar
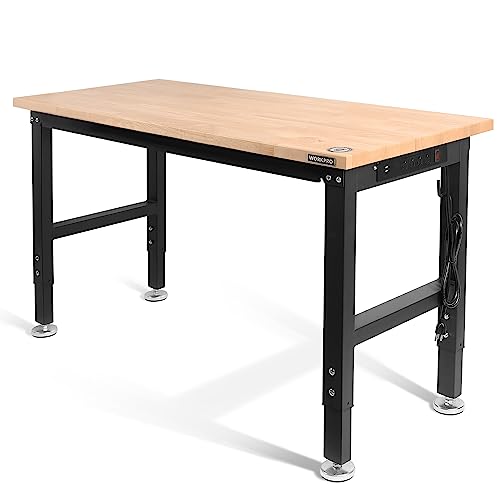
- A workbench
- Pens, Pencils, Paper, Rulers
- Measurement tools
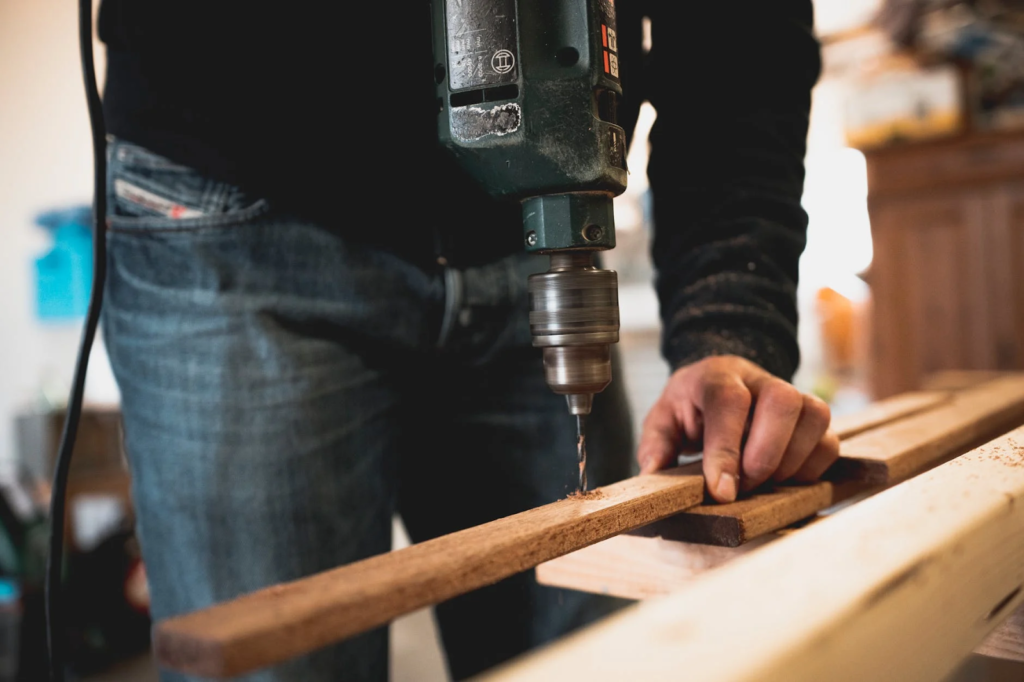
- A drill with multiple drill bit sizes. (preferably electric)
- Clamps
- Wood Glue
- Sandpaper
- Wood Saws
- Chisels
- Screwdrivers
- A soldering iron, solder
- Safety Gear (gloves, eyewear, respirator)
- Paintbrushes
- Polishing Cloth
Materials for the Guitar

- Wood (for the body, neck, and headstock) You can buy a body blank for ease.
- A bridge
- A Neck(fretboard, Fret wire, fretboard inlay, string trees, nut material)
- Tuning Machine Heads
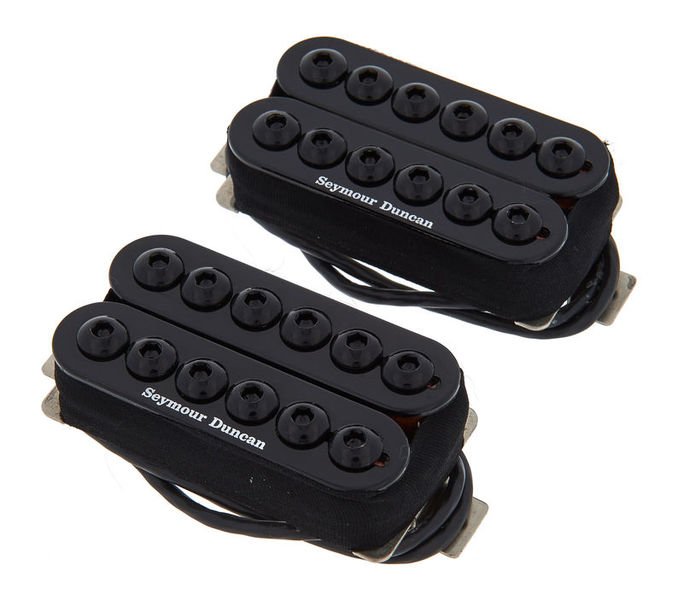
- Pickups (For electric guitar – single-coil, humbucker, active)
- Electrical Wire
- A 1/4 “ output socket plug
- Electronic Controls (selector switches, potentiometers, volume & tone knobs)
- A pickguard (or suitable material)
- Strap Pins
Tips for building electric guitars
If it’s your making your first electric guitar, there are a few things it can help to know before you begin. This will help you make fewer mistakes later!
Be precise with measurement. Be tidy. Work slowly with wood – it’s easy to cut wood off, but it isn’t as easy to put it back on, so be careful where you cut and drill! Make sure it’s exactly where it needs to be.
If it’s your absolute first time, it could be wise to start with a pre-made kit. This way you don’t have to make everything from scratch – which can be difficult for beginners. You can find a great selection of DIY electric guitar kits on amazon.
If you are inexperienced with this, I’d definitely recommend buying a pre-built fretboard. Making fretboards yourself is extremely fiddly, and easy to mess up. If you get it wrong, your guitar won’t sound in tune with other instruments.
Also, if you want to create a unique guitar, try making a classic model first to learn the ins and outs. You will probably make a lot of mistakes in your first guitar!
Now, let’s begin the process itself.
How to Build Electric Guitars – Step-by-step guide:
1. Planning and Design

First, we must design and plan the guitar. This is one of the most important stages and will ensure the rest of the project runs smoothly. As the saying goes – fail to prepare… prepare to fail.
You need to decide on the specifications and measurements of the guitar. It can be wise to do this before you buy any materials, so you can buy exactly what you need in one order.
Wood selection is also a huge topic. There is a huge amount of woods to choose from, from swamp ash to mahogany, maple, and rosewood. Wood also affects the tone and weight of a guitar. To find out more about guitar weights, check our post on how much does a guitar weigh!
- Scale Length
- Body Shape
- Fret Count & Material
- Nut Width
- Headstock design
- Neck Profile, Thickness, and Material
- Tuning Heads
- Tone
- Bridge type
- Pickup Types, Quantity, Positions
- Knobs & Switches
2. Making the Body
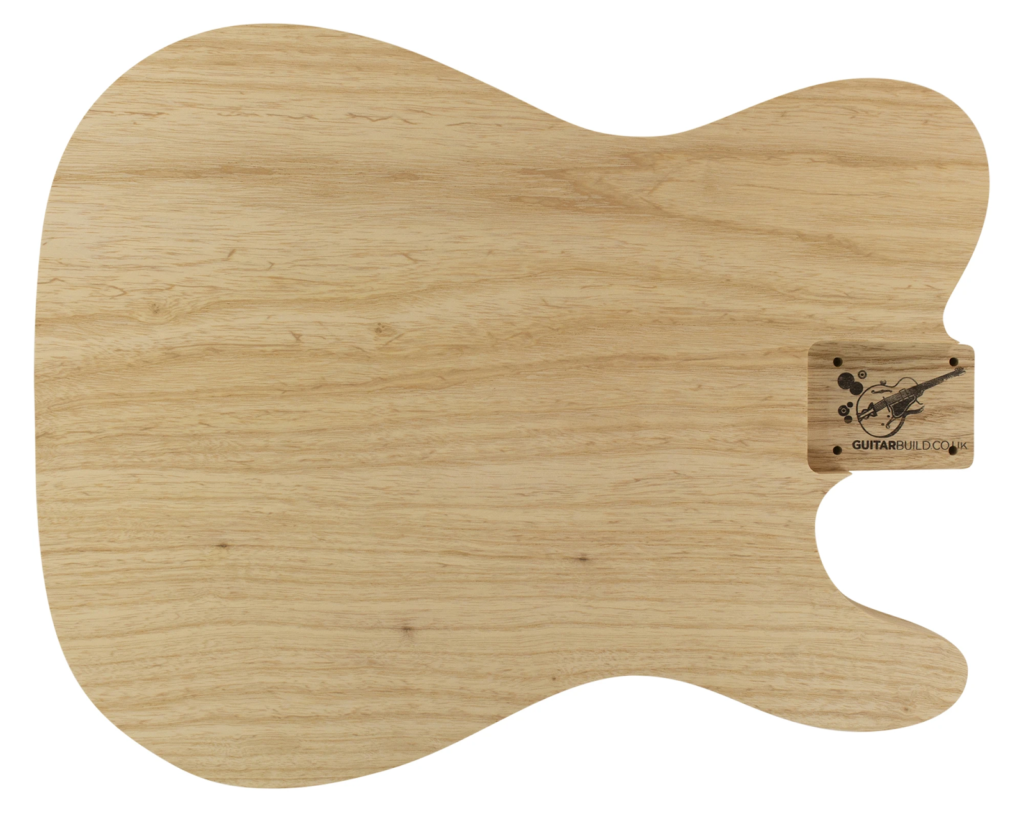
First, make a template on a piece of paper or card that mimics your desired guitar body shape.
Measure and cut the body shape out of your wooden blanks. Some wood materials are more suitable for bodies than others. Often mahogany or maple is preferred over materials like rosewood.
Draw out the areas in pencil and shave away the edges until you reach them.
It’s always a better idea to undercut than overcut. You can finish it with sanding. Use chisels and sandpaper to smooth out the body contours, making the guitar fit comfortably to the user’s body.
This is also a good time to draw and route out the cavities for the electronics, neck joint, and output jack plug. These should be made based on your template. Make sure you include a neck pocket to make attaching the neck easier.
Once the guitar body has been carved, it’s time to look at guitar necks.
3. Making the Neck
Making the guitar neck is difficult, I would suggest buying a premade one, at least the fretboard anyway. It might be easier to use a neck template than to make it from scratch.
Measure and cut the guitar neck wood. File down to measurements. Cut a small trough down the fretboard side to install a truss rod. You will need to install a truss rod to ensure the tension is balanced and the wood doesn’t become warped. It’s easier to buy a premade truss rod than trying to make your own.
Sand flush and glue the fretboard to the flat face. You may need to smooth off the edges of the frets. On the other hand, they can often be sanded before building.
The headstock can be carved later, but it’s good to measure it out now.
There are a lot of different materials you can use for neck wood, maple and ash are great starts.
If you’re making your own fretboard you will need to measure and cut slots for each fret, and carefully insert and glue the fret wire. Frets need to be precisely measured to the right size. If all the parts aren’t measured carefully, the guitar may not sound very good.
You may need to drill some mounting holes to install the tuning pegs if your headstock isn’t pre-drilled. I’d recommend starting with some small pilot holes using a drill press, before expanding the holes out with hand tools.
4. Joining the Neck and Body
It is possible to make an instrument out of a single piece of wood. And in reality, there are a few different ways of joining the neck and body based on your neck type.
See this article for more information on the different neck types a guitar can use.
For beginners, the easiest style would probably be a bolt-on neck joint.
The body socket and neck post areas need to be measured flush and fit tightly. Apply some glue before joining, then put it in place. Finish by drilling the backplate over the joining area, and screw the bolts in as tight as possible.
5. Painting, Finishing, Polishing

Before installing the electronics and other components to your instrument, we want to paint and polish the guitar. This minimizes the risk of getting unwanted paint on your shiny pick-ups or tuning pegs.
First, put protective tape over any areas of the guitar you don’t want to get paint on. You can cover the inner cavities, but it doesn’t matter too much as these get covered by the pickguard.
There are a few different types of paint that are appropriate to use on a guitar. Spray paints can save a lot of time but are also less controllable, and messier. You can get as artistic as you want here, why not do some crazy paint design.
It’s a good idea to use some kind of undercoat. This helps protect the wood and provides a more even look to the paint layers.
Once the paint has dried, the guitar needs coating with finished and varnish to protect the paint and underlying wood. Something like a nitrocellulose lacquer finish will do the job.
Once the finish has dried, you can polish it up. Now it’s time to install the main hardware and electronics.
6. Installing Strap Pins

Strap pins are small screw-like devices that are used to attach a strap to the guitar. These are less important on acoustic guitars, but essential on electrics, particularly if you plan on playing whilst standing up.
Strap pins are fortunately pretty easy to install. Screw one into the bottom edge of the guitar, and screw the other somewhere on the top horn of the guitar. These usually include some kind of nut and washer to minimize damage to the wood of the guitar.
7. Install hardware & electronics
First, install the bridge, machine heads, nut, and other non-electronic hardware components.
Be careful how you screw these in, make sure to measure things precisely before doing any screwing that could leave a mark in the wood. You don’t want to screw something in the wrong place and leave a hole!
Non-electric components are fairly easy to install, make sure everything is tightened enough, but not too much.
Depending on the pickup package you bought, you may have to do some soldering work to get the circuit rigged up. In some products, everything comes pre-connected.
Insert and screw the pickups into place in the electronic cavities. If the pack you bought uses different ones for the bridge and neck, make sure you get them in the right position. Most guitars use two pickups, so this is something to consider.
Screw the potentiometers into the pickguard, and attach the selector switch. Now might also be the time to screw in the output jack and solder it to the pickup.
8. Add the pickguard/scratchplate
Once all the hardware and controls are attached to their positions, it’s time to attach the faceplate. This is really easy. Align it to the right place, and drill small holes through the screw holes into the wood. This should be done with a tiny drill bit, less than 1mm.
Once the holes are drilled, you can start adding screws to connect the plate to the body. Once all the screws are loosely inserted, start screwing them in tightly. This technique ensures you don’t break the faceplate by applying too much pressure to one part of the material.
You can buy faceplates pre-made, or you can make your own. You can use pretty much any material. Wood is great for a natural look, or plastic for something more modern.
9. Add Strings
After all, the hardware and electronics are installed, and the faceplate is attached, all that’s left to do is put the strings on and get them in tune.
The best way to do this is to thread each string one by one. Do not tighten it and get it to tune straight away. Once all the strings are attached loosely, you can start slowly tuning them up, a little on each string at a time.
This way we gradually bring all the strings up to the correct tension at a similar rate. Otherwise, you run the risk of fully tensioning one string on its own, which will probably make it snap.
10. Final Steps
Congratulations, you’ve just built an electric guitar! I hope you are as proud as we are.
All that’s left now is to do a final polish and clean up any dust. It might take a few days for the wood to adjust to the new tension of the strings, so the tuning might be a bit dodgy at the start.
If you’re having issues and your guitar doesn’t sound right, it might be wise to check out our post about why your electric guitar sounds like an acoustic.
FAQs
Can you build your own electric guitar?
It takes time, effort, and resources, but with some patience, you can create your own custom guitar.
The process for building electric guitars is completely different from acoustics. You will need a basic understanding of electronics and soldering, as well as woodworking knowledge.
You can build most of an electric guitar yourself. Certain parts are difficult, or near impossible to produce alone. For example, you would struggle to create your own guitar strings, knobs, machine heads, and pickups. Pickups can be handmade, but this is an art form in itself and takes a fair amount of practice to get right. Fortunately, all of these components can be bought pre-made at decent prices.
How long does it take to build an electric guitar from scratch?
It also depends on how much you build from scratch, and how much you buy pre-made.
Buying pre-built bodies and necks can save a lot of time but are more limiting for unique designs.
On average, it can take anywhere from 2 days to a week to finish a guitar.
Designing and carving the wood can take a long time in itself, let alone assembly.
Gluing, painting, and polishing the guitar can also add additional days to the process. These materials sometimes take anywhere from hours to days to dry properly.
How hard is it to make your own electric guitar?
The chances are, if you are not experienced with woodworking, you will struggle to make a precise, well-made guitar body, neck, and joint.
It can take a lot of practice to refine skills in woodworking, with a lot of trial and error. Certain tasks can be quite complicated. Not only can the woodworking be laborious, but the planning and design process needs to be precise or the guitar can fail. There are a few areas where mistakes could potentially ruin the sound of the guitar, like the fretboard. With concentration and dedication, it can be achieved, although getting it perfect isn’t easy.
How do you make an electric guitar out of wood?
Design the guitar, make the body, make the neck, attach the body and neck, install the electronics. The process of making the neck and body is probably the most difficult, as you will have to manually carve the wood. (Unless using a premade kit body).
Summary
This concludes the electric guitar building article. Now you should understand the process involved with building an electric guitar. It can be complicated and daunting at first, but with some practice and patience, you’ll be an expert in no time. You don’t have to stop at guitars, why not try to make a bass or electric ukulele?
There will be a lot of trial and error, so don’t get frustrated and give up and make mistakes. It’s all part of the process. Even Leo Fender started somewhere! It can be a good idea for any professional guitarist to have a go at the guitar-making process.
Noah is an accomplished audio engineer with several years of experience producing music for major companies and independent artists. He enjoys sharing his vast knowledge of audio engineering topics to help musicians and music producers create great music.