Podcasts are all the rage these past few years. And just like with music production, more and more people are thinking of doing it in a small studio. Sometimes, even in the comfort of their own home.
Is it possible to begin a quality podcast at home? We’re here to tell you that it is. Here are some ways you can use your room or any space in your house as an environment for your podcast.
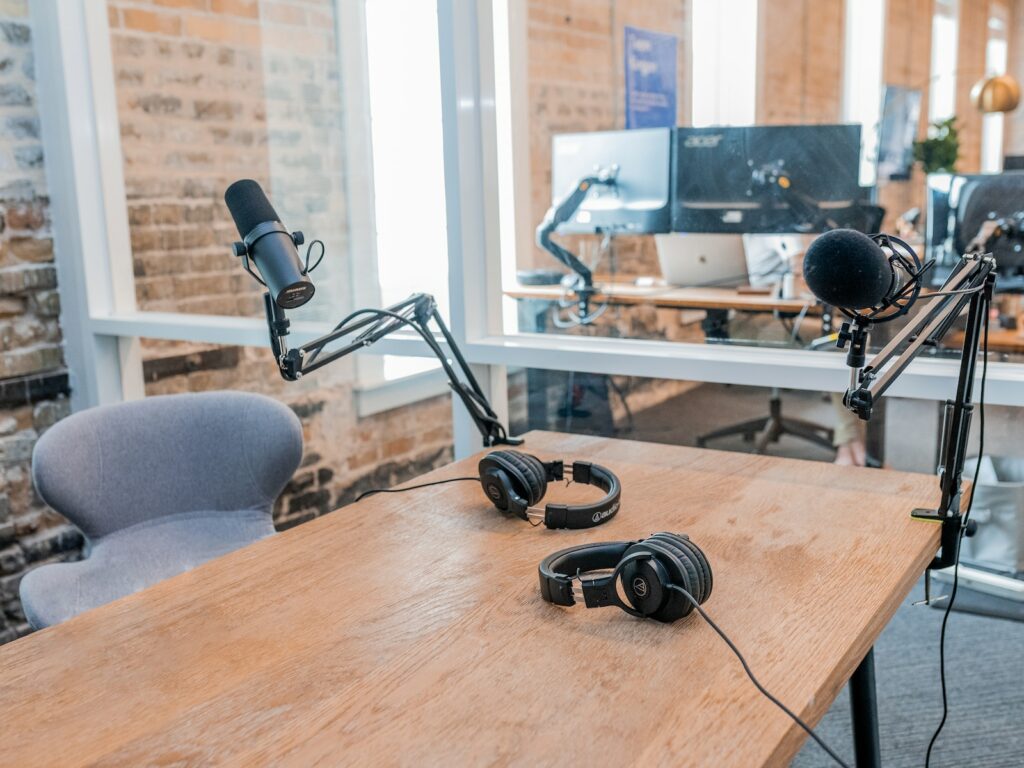
Find a good space
Before anything else, decide on a space to not only record your podcast but film in as well.
One challenge with having a podcast studio built at home is that they are inherently untreated. Room treatment is what makes a space a good recording space. It involves closing doors, and windows, and placing foam on the walls to absorb sound.
If you use an empty space that isn’t treated, you will most likely come across clarity issues with your podcasts.
These include background noises being heard, poor audio quality, and a ton of hours editing audio. To avoid any of this, look for a space that is ideal for recording. Or if you can, somewhere you can easily turn into an ideal recording space.
If you are filming your podcast, your space has to strike a balance between recordable and presentable. It would be nice for your background to have some decoration if you’re thinking of releasing video clips of your podcast as well.
Most people would rent a studio since they’re already treated. But if you are insistent on using a room in your house to have your podcast, there are ways to treat your room.
How to Treat Your Room
If it’s just audio, then a quick solution is to cover yourselves and the microphone in a blanket. Another would be to record inside a closet. But I don’t think that will look appealing if your podcast includes video form.
If you’re interested in making your room fit for both recording and filming, invest in acoustic foam. Place them in certain parts of the walls and they should be able to absorb the noise. That way your voice is preserved without any effect on the room’s acoustics.
Another low-budget solution is to place a rug underneath you. This will do the job of absorbing the sound inside the room.
Egg cartons also act as low-budget acoustic foam, and they’ll make for good room decoration.
Recording Gear Set You’ll Need
Once you have an area for your podcast, now comes the equipment.
This is what will enable you to get your podcast up and running, so it’s best to have everything accounted for.
While fancy gear and add-ons are great, you don’t need to bust the bank to get the best out of your podcast. You just need the following pieces of gear.
Microphones
The thing that will bring your thoughts and discussions to the rest of your gear is the microphone.
In terms of what kind of microphone to use, I personally recommend dynamic microphones.
Apart from them being slightly more affordable than a condenser, they are less sensitive than them. This might sound like a disadvantage but it is in fact the opposite.
Since they are less sensitive, they won’t be able to pick up as much background noise as compared to condenser microphones. You won’t have to worry about background noise when it’s not your turn to talk.
Unlike condenser microphones, you can use both XLR or USB connection, plus there are dynamic microphones designed for podcasts.
With microphones, you should also include a microphone stand and a pop filter.
Unless you don’t mind holding your microphone the entire time, you will need to buy a microphone stand.
Alongside that, you should also get a pop filter. This is to filter out something called plosives.
Plosives are the sounds you make when you say words that start or end with “b” and ‘p”. They can be quite jarring to hear, so to help make filter those sounds out.
Audio Interface
The next important piece of gear is the audio interface.
This is the main connector of your microphone to your computer. In technical terms, it converts the audio signal into digital data. Digital data is needed for your computer and your digital audio workstation (DAW) to recognize what it is you are trying to record.
Audio interfaces come in many shapes and sizes. One thing that will help you decide on what audio interface to get is how many people will be speaking in your podcast.
If it is two people, then an audio interface with two inputs and outputs (I/Os) will suffice. The more speakers, the more I/Os you will need.
Audio interfaces’ I/Os connect either through XLR or 1/4 jack cables. You won’t need it as much if you use a USB microphone. That said if you end up using both, that will save you some I/Os.
Digital Audio Workstation
The Digital Audio Workstation (DAW) is where you record all the audio for your podcast.
When you think of DAWs, it’s normally associated with making music. But these are also vital for recording audio for podcasts.
Not just that, but you can also do the necessary editing needed for your podcast. From cutting out sections without audio to making the quality of the audio cleaner and better, to mixing so that the audios are all balanced out.
There are many DAWs out there, but you can go for much simpler DAWs since you won’t be needing the tools associated with music making. Examples of DAWs you can use include Audacity. and Pro Tools.
Having a DAW is a key ingredient in recording your podcast episodes.
Camera
This last item is only a necessity if you also plan to release your podcast in video form.
A high-quality camera will make your podcast look great, on top of it already sounding great.
Ride the Wave of Podcasting
No need to spend on renting a studio or gas to go there. Now you can turn any room inside your house into a good quality podcast studio. All that’s left to do is start recording.
Grab a friend, and start recording your podcast today.